
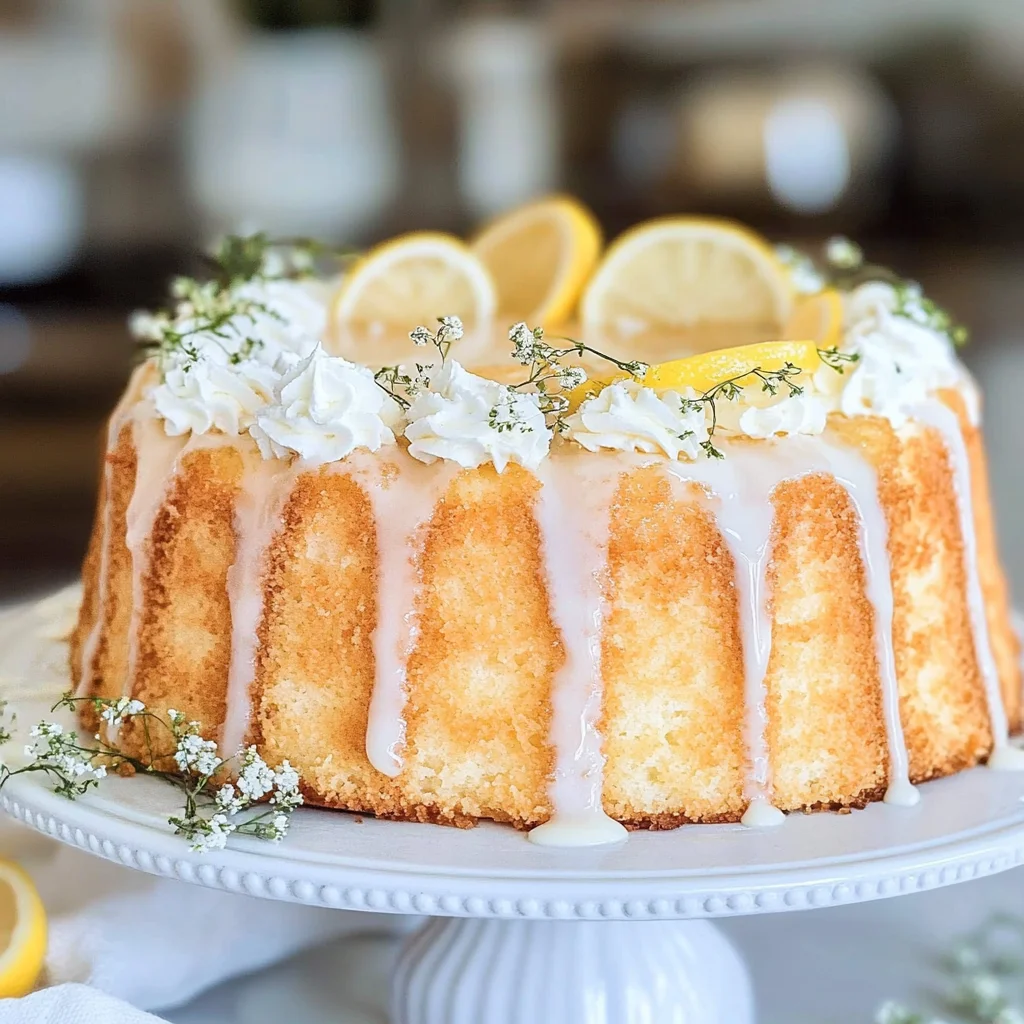
Imagine sinking your fork into a cloud of sweetness, where each bite of angel food cake melts in your mouth, leaving behind whispers of vanilla and a hint of nostalgia. This ethereal dessert, with its delicate texture and airy structure, is the kind of treat that dances on your taste buds and lifts your spirits, making it an ideal companion for celebrations or quiet moments alike.
As I recall the first time I baked this heavenly delight for a family gathering, the laughter and joy around the table paired perfectly with the lightness of the cake. The best part? It’s a showstopper that requires just a handful of simple ingredients, transforming them into a masterpiece that promises an unforgettable flavor experience. Whether adorned with fresh berries or enjoyed plain, angel food cake is sure to make any occasion feel extraordinary.
Why Is angel food cake So Irresistibly Good?
Light and fluffy: This cake’s unique texture comes from whipping 12 large egg whites, creating a delightful cloud-like experience with every bite.
Sweet perfection: With a perfect balance of sweetness from the granulated sugar, it complements any topping or fruit.
Simple to make: Using just a few pantry staples like cake flour and cream of tartar, this recipe is easy enough for any home baker.
Versatile delight: Whether served plain or dressed up with fresh berries and whipped cream, it’s a showstopper for any occasion.
Quick to prepare: With only 20 minutes of prep time, you can impress guests without spending hours in the kitchen!
angel food cake Ingredients
- For the Cake
- 1 cup cake flour (sifted) – This light flour helps create the airy texture that makes angel food cake so delightful.
- 1 cup granulated sugar (divided) – Use half to sweeten the egg whites and half for folding into the batter for a perfect rise.
- 12 large egg whites (room temperature) – Room temperature egg whites whip up better, creating a fluffier cake.
- 1 teaspoon cream of tartar – This stabilizes the egg whites, ensuring your cake maintains its airy structure.
- 1/4 teaspoon salt – A pinch of salt enhances the sweetness and balances flavors in your angel food cake.
- 1 teaspoon vanilla extract – Adds a lovely depth of flavor to this light and fluffy dessert.
How to Make angel food cake

1. Preheat the oven to 350°F (175°C). This is the perfect temperature for creating a beautifully golden crust on your light and airy cake.
2. Sift together the 1 cup of cake flour and half of the granulated sugar (1/2 cup) in a mixing bowl. Sifting helps create a lighter texture, essential for that delightful fluffiness.
3. Beat the 12 large egg whites in another bowl until foamy, then add in the 1 teaspoon of cream of tartar and 1/4 teaspoon of salt. This mixture will create stable peaks needed for the cake’s structure.
4. Continue beating until soft peaks form, then gradually add the remaining sugar while beating until stiff peaks form. The egg whites should be glossy and hold their shape beautifully at this stage.
5. Fold in the flour mixture and 1 teaspoon of vanilla extract into the beaten egg whites gently. Be careful not to deflate those precious air bubbles you’ve created!
6. Pour the batter into an ungreased tube pan, allowing it to rise beautifully during baking without any interference from grease.
7. Bake in the preheated oven for 30-35 minutes or until the cake is golden brown and springs back when gently touched—this is where that heavenly aroma fills your kitchen!
8. Remove from the oven and invert the pan to cool completely before removing the cake. This step ensures your angel food cake retains its height and airy texture as it cools.
Optional: Serve with fresh berries or a dusting of powdered sugar for an extra touch of sweetness.
Exact quantities are listed in the recipe card below.
Tips for the Best angel food cake
- Room Temperature Egg Whites: Ensure your egg whites are at room temperature for maximum volume. Cold eggs won’t whip up as fluffy.
- Sift Flour Twice: Sifting the cake flour not only removes lumps but also aerates it, contributing to the lightness of your angel food cake.
- Fold Gently: When combining the flour mixture with egg whites, use a gentle folding technique. Overmixing can deflate the batter and result in a denser cake.
- Ungreased Pan is Key: Always use an ungreased tube pan to help the cake climb the sides as it bakes, ensuring that it rises beautifully.
- Cool Upside Down: Invert the pan immediately after baking to prevent collapsing. This cooling method preserves the airy texture of your angel food cake.
How to Store and Freeze angel food cake
Room Temperature: Keep your angel food cake covered with a clean kitchen towel or in an airtight container for up to 3 days to maintain its fluffiness.
Fridge: If you need to store it longer, refrigerate the cake in an airtight container for up to a week, but be aware that it may lose some of its light texture.
Freezer: For long-term storage, freeze slices of angel food cake wrapped tightly in plastic wrap and then aluminum foil for up to 3 months. Thaw at room temperature before serving.
Reheating: To refresh your cake after freezing, gently warm slices in a toaster oven for a few minutes—this will revitalize its soft texture!
angel food cake Your Way
Feel free to let your creativity shine and personalize this delightful dessert to suit your taste!
- Citrus Zest: Add 1 tablespoon of lemon or orange zest for a refreshing twist. The bright notes will elevate the cake’s flavor and make it even more vibrant. This addition pairs beautifully with fresh berries, enhancing that light, airy texture.
- Almond Extract: Substitute vanilla extract with almond extract for a nutty undertone. This subtle switch adds depth and warmth to the cake, making it a lovely alternative for those who enjoy a slightly different flavor profile. Pair it with sliced almonds on top for extra crunch!
- Chocolate Lovers: Fold in 1/4 cup of cocoa powder into the dry ingredients for a chocolatey delight. This variation transforms your cake into a rich treat while maintaining that airy quality. Serve it with whipped cream and berries for an indulgent dessert.
- Herbal Infusion: Incorporate 1 tablespoon of finely chopped fresh herbs like rosemary or basil. This unexpected twist brings an aromatic freshness to each bite, creating a unique flavor experience. It’s perfect for serving alongside fruit compote!
- Gluten-Free Option: Use gluten-free cake flour instead of regular flour to keep it light and fluffy without gluten. This swap ensures everyone can enjoy this classic dessert without compromising on texture or taste. Your guests won’t even notice the difference!
- Berry Bliss: Mix in 1/2 cup of pureed strawberries or raspberries into the batter. This fruity addition not only adds sweetness but also beautiful color throughout the cake. Top with fresh berries for an eye-catching presentation at any gathering.
- Spicy Kick: Add 1/2 teaspoon of cinnamon or cardamom for a warm spice note. This subtle hint of spice offers an exciting contrast to the sweetness, making every slice more complex and flavorful. It’s delightful when paired with a dollop of whipped cream.
- Nutty Crunch: Fold in 1/2 cup of finely chopped nuts like walnuts or pecans before baking for added texture. The crunchy bits create an enjoyable contrast to the soft cake, making each bite delightful and satisfying. It’s perfect as a special occasion treat!
Make Ahead Options

Preparing angel food cake is a delightful way to save time while ensuring you have a light and fluffy dessert ready for any occasion. You can easily pre-measure the cake flour, granulated sugar, cream of tartar, and salt up to 3 days in advance, storing them in airtight containers. Additionally, the egg whites can be whipped and stored in the refrigerator for up to 24 hours before folding them into the flour mixture. When you’re ready to bake, just follow the steps of preheating your oven to 350°F (175°C), sifting together the flour and half of the sugar, then beating those egg whites with cream of tartar until stiff peaks form. Gently combine everything with vanilla extract before pouring it into an ungreased tube pan and baking for 30-35 minutes. This make-ahead approach not only saves you time but also preserves the airy texture that makes this angel food cake so special!
angel food cake Recipe FAQs
Why is it important to use cake flour instead of all-purpose flour?
Cake flour has a lower protein content than all-purpose flour, which helps create that light and airy texture we love in angel food cake. The sifted cake flour also incorporates air, making your cake even fluffier!
How can I ensure my egg whites reach the right stiffness?
Start with room temperature egg whites, as they whip up more easily. Begin by beating them until they’re foamy, then add the cream of tartar and salt. Keep beating until you see soft peaks form before adding the remaining sugar gradually. When stiff peaks form, your batter will be ready for folding!
What’s the best way to store leftover angel food cake?
To keep your angel food cake fresh, wrap it tightly in plastic wrap or store it in an airtight container at room temperature. It’s best enjoyed within 2-3 days for optimal flavor and texture.
Can I freeze my angel food cake for later use?
Absolutely! Wrap the cooled angel food cake tightly in plastic wrap and then in aluminum foil before placing it in the freezer. It can be stored for up to 2 months. Thaw it at room temperature when you’re ready to enjoy a slice!
What should I do if my cake doesn’t rise properly?
If your angel food cake doesn’t rise as expected, double-check that you’re using fresh ingredients, especially egg whites. Make sure you’re beating them to stiff peaks and gently folding in the flour mixture without deflating the batter. Also, ensure your oven is preheated to 350°F (175°C) before baking.
How many servings does this recipe yield?
This recipe makes about 4 servings, with each serving containing around 70 calories. Perfect for a small gathering or a delightful treat just for yourself!