
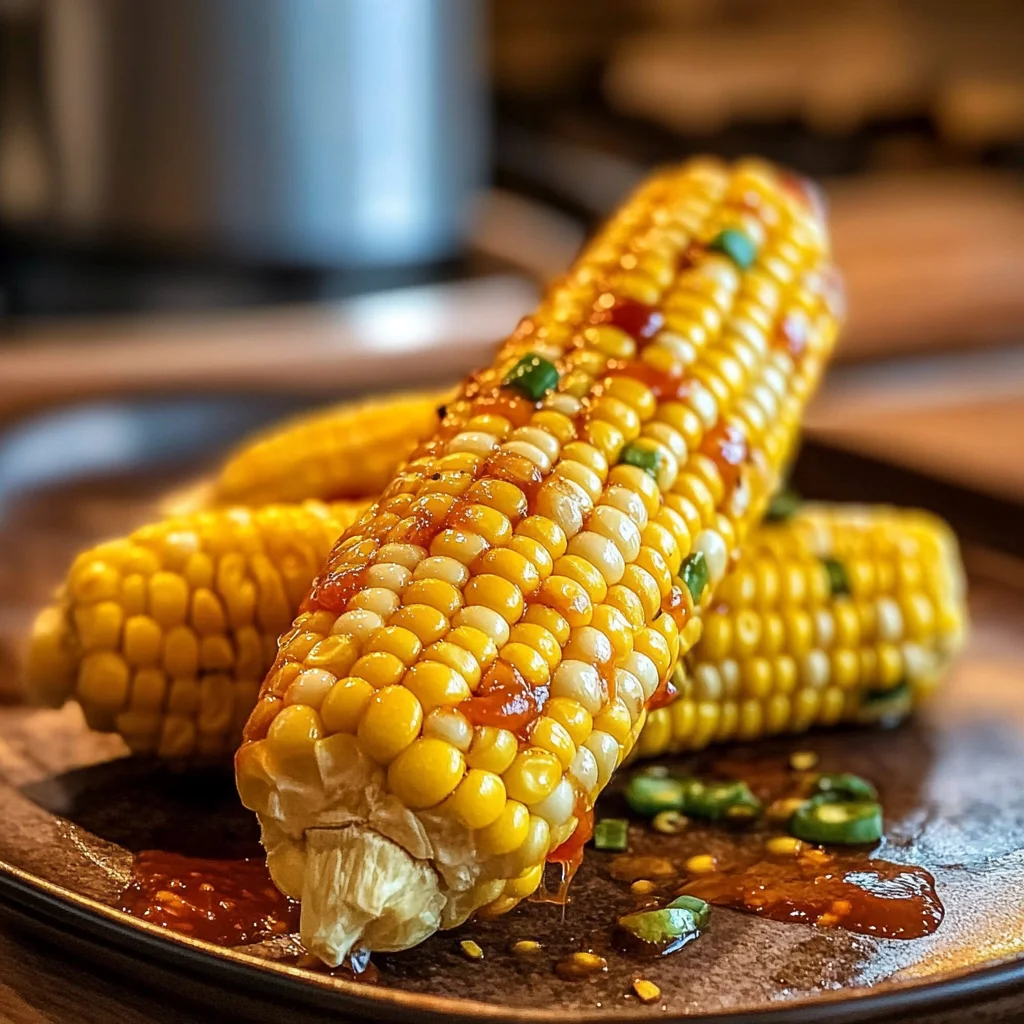
Picture this: the sweet aroma of oven roasted corn on the cob wafts through your kitchen, instantly transforming it into a cozy haven. Each golden kernel glistens with anticipation, promising a delightful crunch and a burst of smoky sweetness that will dance on your taste buds.
As you pull that deliciously roasted corn from the oven, you’re transported back to summer barbecues with friends and family, where laughter mingles with the sizzle of grilling. Imagine biting into that perfectly seasoned cob, the buttery richness mingling with hints of spice, making it an irresistible treat for any occasion—be it a sunny picnic or a cozy movie night at home.
Why Will You Keep Making oven roasted corn on the cob?
Fresh corn on the cob brings an irresistible sweetness that shines through in every bite. Effortless to prepare, this recipe only takes 10 minutes of prep time, making it perfect for busy weeknights or last-minute gatherings. Flavor-packed, the combination of melted butter, salt, and a hint of paprika elevates the dish to a smoky delight. Versatile enough to pair with any meal, this oven roasted corn on the cob is sure to please everyone at your table—whether it’s a summer BBQ or a cozy family dinner!
oven roasted corn on the cob Ingredients
For the Corn on the Cob
- 4 ears fresh corn on the cob (husked and cleaned) – Fresh corn is key for that sweet, juicy flavor that shines in every bite.
For the Seasoning
- 4 tablespoons butter (melted) – Butter adds richness and helps the seasonings stick to your delicious oven roasted corn on the cob.
- 1 teaspoon salt (to taste) – Salt enhances the natural sweetness of the corn, balancing flavors beautifully.
- 1 teaspoon black pepper (to taste) – Black pepper introduces a subtle kick, perfectly complementing the sweetness of the corn.
- 1 teaspoon paprika (optional) – Paprika gives a lovely smoky note and vibrant color to your roasted corn.
How to Make oven roasted corn on the cob

1. Preheat your oven to 400°F (200°C). This ensures a perfectly cooked and deliciously sweet corn on the cob, with that wonderful smoky flavor we all love.
2. Husk the corn and remove all silk. Take a moment to clean each of the 4 ears of fresh corn thoroughly; this step is essential for a delightful eating experience.
3. Brush each ear of corn with 4 tablespoons of melted butter. Then, season generously with salt, black pepper, and paprika if you’re feeling adventurous! This will enhance the natural sweetness of the corn beautifully.
4. Wrap each ear of corn snugly in aluminum foil. This helps to lock in moisture and flavors while roasting, ensuring your corn comes out tender and juicy.
5. Place the wrapped corn on a baking sheet and roast in the preheated oven for 30 minutes. The aroma will fill your kitchen, making it hard to wait!
6. Remove from the oven, unwrap carefully (watch out for steam!), and serve hot. Your family will be ready to dig into this irresistible treat!
Optional: Sprinkle with fresh herbs or a squeeze of lime for an extra flavor boost!
Exact quantities are listed in the recipe card below.
Tips for the Best oven roasted corn on the cob
- Fresh Corn Matters: Choose sweet, fresh ears of corn for the best flavor; older corn can be tough and less tasty.
- Even Butter Coating: Ensure each ear is evenly brushed with melted butter; this helps the seasonings stick better and enhances flavor.
- Don’t Skip the Foil: Wrapping your corn in aluminum foil locks in moisture, ensuring tender, juicy kernels. Skipping this step can lead to dry corn.
- Adjust Seasoning: Taste your melted butter before applying; if you love a kick, feel free to increase the paprika for an extra smoky flavor.
- Rest Before Serving: Let the corn sit for a few minutes after roasting; this allows steam to settle and ensures every bite is perfectly delicious.
How to Store and Freeze oven roasted corn on the cob
- Room Temperature: Enjoy your oven roasted corn on the cob fresh out of the oven. If left uneaten, it can stay at room temperature for up to 2 hours.
- Fridge: Store leftover corn in an airtight container in the fridge for up to 3 days. Wrap it tightly with plastic wrap if you prefer to keep it on the cob.
- Freezer: For longer storage, freeze individually wrapped ears of corn using aluminum foil or freezer bags. It will maintain quality for up to 3 months.
- Reheating: To reheat, place in a preheated oven at 350°F (175°C) for about 10-15 minutes or microwave on high for 1-2 minutes, until warmed through.
Make oven roasted corn on the cob Your Own
Feel free to get creative and make this dish uniquely yours with these delightful twists!
- Herb-Infused: Add fresh herbs like thyme or rosemary for a fragrant touch. Simply mix chopped herbs into the melted butter before brushing it onto the corn. This adds an aromatic layer that elevates each bite.
- Cheesy Delight: Sprinkle grated Parmesan or feta cheese over the corn after roasting for a savory kick. The warm corn will melt the cheese slightly, creating a deliciously rich flavor that complements the sweetness perfectly.
- Spicy Kick: Mix in some cayenne pepper or chili powder for a fiery twist. Adjust the amount based on your heat preference, and you’ll experience a delightful warmth that dances on your taste buds.
- Sweet & Smoky: Brush with a mixture of honey and smoked paprika for a sweet contrast. The honey caramelizes during roasting, giving you a beautiful glaze that enhances the natural sweetness of the corn.
- Zesty Citrus: Squeeze fresh lime juice over the finished corn for a bright, tangy finish. The citrus adds a refreshing element that balances out the richness of the butter beautifully.
- Balsamic Glaze: Drizzle balsamic reduction over your roasted corn for an elegant touch. This adds depth and a slight tanginess that pairs wonderfully with the sweetness of the corn.
- Nutty Crunch: Top with crushed nuts like walnuts or pecans for added texture. The nuttiness complements the corn’s flavor while providing an appealing crunch in every bite.
- Garlic Lovers: Incorporate minced garlic into the butter mixture for an aromatic boost. Roasting infuses each ear with garlicky goodness, making it irresistible to all garlic fans!
Make Ahead Options

Preparing oven roasted corn on the cob is a fantastic choice for meal prep, as it allows you to enjoy this sweet and smoky delight with minimal fuss. You can husk and clean the corn up to 24 hours in advance, making the prep process a breeze. Additionally, you can brush each ear of corn with melted butter and season it with salt, pepper, and paprika—this step can also be done ahead of time. Just wrap the seasoned corn in aluminum foil, store it in the fridge, and when you’re ready to serve, simply pop it into a preheated oven at 400°F (200°C) for 30 minutes. This way, you’ll have perfectly roasted corn on the cob whenever you’re ready for it, ensuring great taste without last-minute stress!
oven roasted corn on the cob Recipe FAQs
What type of corn should I use for roasting?
For the best flavor and texture, choose fresh, sweet corn on the cob that is in season. Look for ears with bright green husks and plump kernels. The fresher, the better!
How can I ensure my corn is flavorful?
Brushing each ear of corn with melted butter is essential for adding richness. Don’t skimp on seasoning! Adjust the salt and pepper to your taste, and consider adding paprika for a smoky kick. This simple blend elevates the natural sweetness of the corn beautifully.
What’s the best way to store leftover roasted corn?
If you have any leftovers (although that’s rare!), allow the corn to cool completely before wrapping it tightly in aluminum foil or placing it in an airtight container. Properly stored, it can last in the fridge for up to 3 days.
Can I freeze oven roasted corn on the cob?
Absolutely! To freeze, first cool the roasted corn completely, then wrap each ear tightly in plastic wrap followed by aluminum foil to prevent freezer burn. Enjoy your frozen treasures within 3 months for optimal taste!
What if my corn isn’t cooked through after 30 minutes?
Oven temperatures can vary slightly. If you find your corn isn’t tender after 30 minutes, simply re-wrap it and return it to the oven for an additional 5-10 minutes. You’ll know it’s done when the kernels are plump and tender.
How many servings does this recipe yield?
This delightful recipe serves 4 people, with each serving containing approximately 120 calories. It’s perfect for family gatherings or a cozy evening at home!
Oven Roasted Corn on the Cob
Ingredients
Method
- Preheat the oven to 400°F (200°C).
- Husk the corn and remove all silk.
- Brush each ear of corn with melted butter and season with salt, pepper, and paprika if using.
- Wrap each ear of corn in aluminum foil.
- Place the wrapped corn on a baking sheet and roast in the preheated oven for 30 minutes.
- Remove from the oven, unwrap, and serve hot.