
Lemon Garlic Green Beans with Toasted Almonds Recipe in 20 Minutes
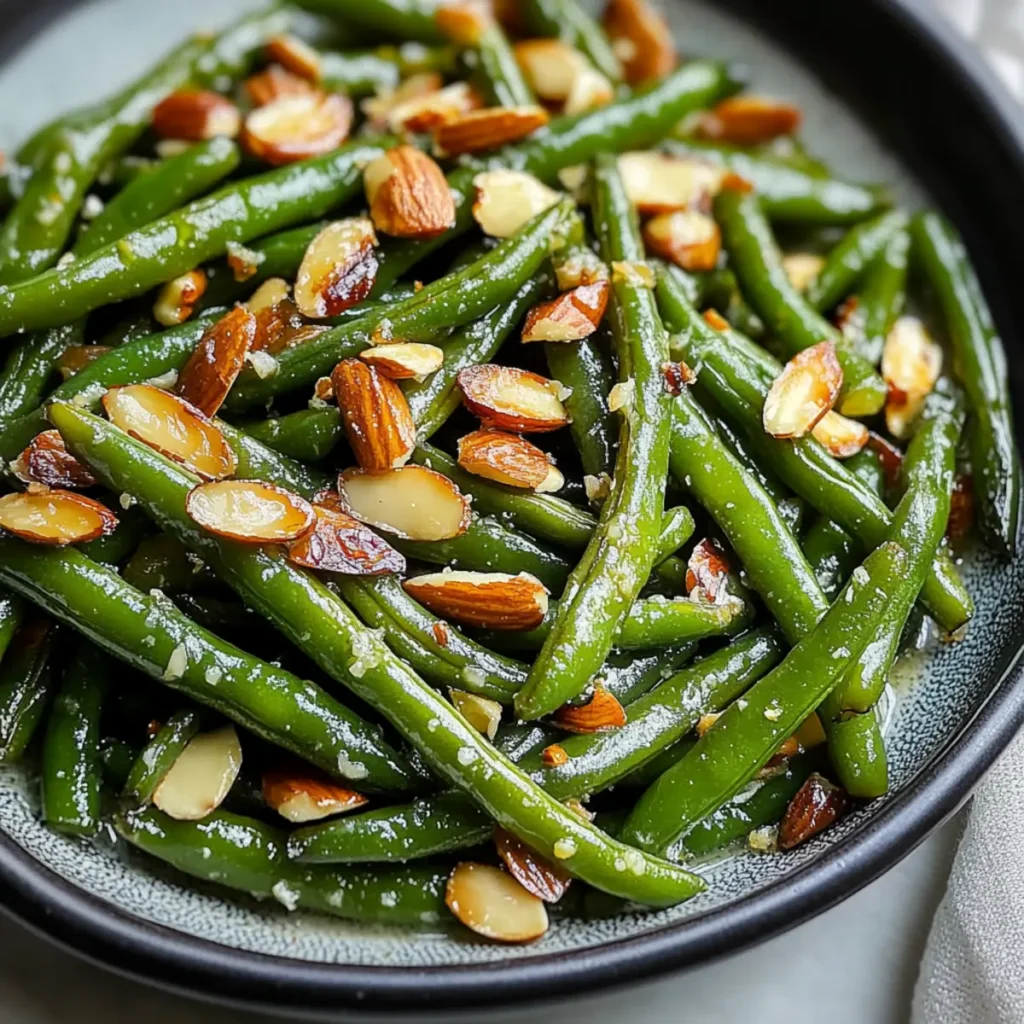
Cooking is all about harmony. Just picture a plate full of vibrant green beans, kissed by a bright burst of lemon and enriched with the aroma of sautéed garlic. Now, add a sprinkling of toasted almonds on top, and voilà! You have a dish that sings with flavor and elegance—Lemon Garlic Green Beans with Toasted Almonds. It’s the kind of dish that makes you feel like a gourmet chef in your own kitchen, without needing a Michelin star. This delightful recipe is not just a pretty face; it’s perfect for busy weeknights but elegant enough for your next dinner party. Whether you’re pairing it with grilled chicken or a hearty grain salad, these green beans will steal the spotlight and leave your guests asking for seconds. Plus, the 20-minute prep and cooking time means you can whip it up faster than you can say “bon appétit!” Ingredients for Lemon Garlic Green Beans with Toasted Almonds Here’s what you’ll need to make this delicious Lemon Garlic Green Beans with Toasted Almonds: 1 pound fresh green beans – Choose firm beans with a vibrant green hue and trim the ends for best results. 3 cloves garlic – Use fresh garlic for a robust flavor; minced finely to release maximum aroma. 1 lemon – Get a juicy lemon to extract both juice and zest, adding a delightful brightness to the dish. 1/3 cup sliced almonds – Toast them for extra crunch and flavor; almond slivers work just as well. 2 tablespoons olive oil – Extra virgin olive oil enhances taste and makes everything more delicious. 1 teaspoon salt – Adjust to taste, but a pinch is perfect for enhancing flavors. 1/4 teaspoon black pepper – Freshly cracked adds a lovely kick. How to Make Lemon Garlic Green Beans with Toasted Almonds Follow these simple steps to prepare this delicious Lemon Garlic Green Beans with Toasted Almonds: Step 1: Heat the Oil In a large frying pan, heat 2 tablespoons of olive oil over medium heat. Ensure you have a nice sizzle when you add your garlic. Step 2: Sauté the Garlic Add 3 minced cloves of garlic to the hot oil and sauté until it’s fragrant, about a minute. Keep an eye on it; we want it to be golden, not burnt. Step 3: Add the Green Beans Toss in the trimmed fresh green beans, stirring for about 5 minutes. You want them to be tender yet still have a little crunch; aim for that perfect al dente texture. Step 4: Season with Lemon Pour in the juice from your fresh lemon and sprinkle lemon zest over the beans. Add salt and pepper, mixing everything together to coat those beans in zesty goodness. Step 5: Toast the Almonds If you haven’t prepped your almonds yet, toast them in a dry skillet over low heat for about 3-5 minutes until golden brown and fragrant. This step is crucial for maximizing the nutty flavor. Step 6: Serve and Enjoy Remove the pan from heat and plate your lemon garlic green beans. Generously sprinkle the toasted almonds on top for that crunchy finish. Serve warm and watch the smiles! With its combination of bright lemon, savory garlic, and crunchy almonds, this Lemon Garlic Green Beans with Toasted Almonds recipe transforms a simple vegetable side into a flavor-packed experience. You can easily play around with other ingredients too! Try adding different nuts, or toss in a bit of feta cheese for a creamy finish that will have your taste buds dancing. Now go ahead, give this recipe a whirl, and experience the burst of flavors it brings to your dinner table! Happy cooking! Perfecting Lemon Garlic Green Beans with Toasted Almonds Cooking Process To achieve the best results with Lemon Garlic Green Beans with Toasted Almonds, start by toasting your almonds first to enhance their nutty flavor. Then, sauté the garlic, add the green beans, and finish with lemon juice and zest for bright, tangy goodness. Add Your Touch to Lemon Garlic Green Beans with Toasted Almonds Feel free to customize your Lemon Garlic Green Beans with Toasted Almonds! Swap almonds for walnuts or pecans, add a pinch of red pepper flakes for heat, or toss in some cherry tomatoes for a splash of color and sweetness. Storing & Reheating Lemon Garlic Green Beans with Toasted Almonds Store leftover Lemon Garlic Green Beans with Toasted Almonds in an airtight container in the fridge for up to three days. To reheat, simply warm them in a pan over low heat to maintain that fresh crunch. It’s funny how this dish became a staple at my family gatherings. After I brought Lemon Garlic Green Beans with Toasted Almonds to a potluck, my cousin asked me if I had secretly enrolled in culinary school! FAQs About Lemon Garlic Green Beans with Toasted Almonds What is Lemon Garlic Green Beans with Toasted Almonds? Lemon Garlic Green Beans with Toasted Almonds is a vibrant and flavorful side dish that elevates simple green beans to extraordinary levels. This recipe features freshly sautéed green beans tossed with zesty lemon juice, aromatic garlic, and crunchy toasted almonds. The balance of flavors and textures makes it a staple at gatherings and weeknight dinners alike. With just a handful of ingredients and minimal cooking time, this dish is both quick to prepare and impressive enough for company. How do I make Lemon Garlic Green Beans with Toasted Almonds? To make Lemon Garlic Green Beans with Toasted Almonds, start by toasting sliced almonds in a pan until golden brown. In the same pan, heat olive oil and sauté minced garlic until fragrant. Then, add trimmed green beans and cook them until tender. Finish the dish by combining fresh lemon juice and zest with salt and pepper, and topping the beans with the toasted almonds. This quick and healthy recipe is perfect for any occasion. Can I customize the Lemon Garlic Green Beans with Toasted Almonds recipe? Absolutely! One of the best things about Lemon Garlic Green Beans
Refreshing 2-Minute Matcha Lemonade Recipe for Instant Enjoyment

There’s something undeniably refreshing about a glass of Matcha Lemonade (2-Minute Stir). Imagine the tangy burst of fresh lemon juice harmoniously mingling with the earthy sweetness of matcha, dancing around your taste buds and waking up your senses. Each sip is like a mini-vacation, delivering a unique concoction that tantalizes yet revitalizes, especially on a warm day when the sun is shining bright, and the only playlist you need is the sound of clinking ice. To make things even better, you can whip up this invigorating Matcha Lemonade in just two minutes. Yes, I said two minutes! Whether you’re lounging by the pool, gearing up for a casual gathering, or in dire need of hydration after a workout, this vibrant drink is your go-to companion. So grab your blender, and let’s dive into a world where green tea meets lemony goodness for a refreshing twist that feels anything but ordinary. Ingredients for Matcha Lemonade (2-Minute Stir) Here’s what you’ll need to make this delicious Matcha Lemonade (2-Minute Stir): 4 cups cold water – The foundation of your lemonade, cooling and refreshing, just like a gentle summer breeze. Use filtered water for the best taste. 1/4 cup fresh lemon juice – Bright and zesty, this ingredient adds a lovely tang. Make sure to use fresh lemons because bottled versions just don’t pack the same punch. 1/4 cup honey or agave syrup – A natural sweetener that balances the tartness of the lemon and complements the matcha. Choose agave syrup for a vegan option. 2 tablespoons matcha powder – The star of the show! This fine green powder is packed with antioxidants and provides that unique earthy flavor that makes this drink stand out. Ice for serving – Because what’s lemonade without the chill? Ice not only cools down the drink but also makes it a delightful treat on a hot day. How to Make Matcha Lemonade (2-Minute Stir) Follow these simple steps to prepare this delicious Matcha Lemonade (2-Minute Stir): Step 1: Gather Your Materials Collect your ingredients and a large pitcher. You’ll also need a whisk or a good old-fashioned spoon to mix everything together. Measuring cups will come in handy too. Step 2: Combine the Ingredients In your pitcher, pour in the 4 cups of cold water, followed by the 1/4 cup of fresh lemon juice. Add the 1/4 cup of honey or agave syrup to the party, followed by the bright green 2 tablespoons of matcha powder. Step 3: Stir it Up Using your whisk or spoon, stir everything together vigorous until the matcha powder is fully dissolved. It’s important—this isn’t a contest. You want a smooth mixture, not clumps of matcha floating about like uninvited guests. Step 4: Taste and Adjust Take a small taste of your Matcha Lemonade. Feel free to add more sweetener or lemon juice according to your preference. You are the chef here, and your palate rules! Step 5: Chill Out Drop in a handful of ice into the pitcher. You can pour into individual glasses or serve straight from the pitcher. Remember, ice adds excitement (and coolness)! Step 6: Serve and Enjoy Transfer to glasses and garnish with a slice of lemon or even a little sprig of mint for that extra flair. Sip slow; you don’t want to rush through this refreshing moment! So there you have it—the perfect Matcha Lemonade (2-Minute Stir). It’s quick, refreshing, and perfect for any occasion. Enjoy every sip and let that delightful flavor transport you to your happy place. Cheers to the magic of matcha and lemons! This showstopping Matcha Lemonade (2-Minute Stir) delivers restaurant-quality results using simple ingredients you probably already have at home. The perfect balance of textures and flavors creates an unforgettable dining experience that will have everyone asking for seconds. Picture-perfect presentation with vibrant colors makes this dish absolutely Instagram-worthy and guaranteed to impress any dinner guest. Incredibly versatile recipe that works beautifully for weeknight dinners, meal prep, special occasions, or even outdoor entertaining sessions. Perfecting Matcha Lemonade (2-Minute Stir) Cooking Process Begin by measuring out all your ingredients beforehand. Combine the cold water, fresh lemon juice, honey or agave syrup, and matcha powder into a pitcher. Stir patiently until everything is well mixed and the matcha dissolves completely. Add Your Touch to Matcha Lemonade (2-Minute Stir) Feel free to personalize your Matcha Lemonade by using different sweeteners like maple syrup or adjusting the tartness with more or less lemon juice. Toss in some fresh mint leaves or a splash of sparkling water for a refreshing twist. Storing & Reheating Matcha Lemonade (2-Minute Stir) Store any leftover Matcha Lemonade in the refrigerator in a sealed container for up to three days. Stir again before serving, and it’s best enjoyed cold over ice, so there’s no need for reheating. Getting feedback from friends who tried it at my last barbecue was a joy; they were surprised to find out how simple it was to whip up such a delightful drink. FAQs About Matcha Lemonade (2-Minute Stir) What is Matcha Lemonade (2-Minute Stir)? Matcha Lemonade (2-Minute Stir) is a refreshing beverage that combines the vibrant flavors of matcha green tea and tart lemon with a touch of sweetness. This quick and easy recipe transforms simple ingredients into a deliciously invigorating drink in just two minutes. Enjoyed chilled, this drink is perfect for warm days, gatherings, or as a revitalizing boost during your afternoon slump. It’s not just about quenching your thirst; it’s also packed with antioxidants from the matcha, making it a healthier choice compared to sugary beverages. How do I make Matcha Lemonade (2-Minute Stir) sweeter? If you prefer a sweeter Matcha Lemonade (2-Minute Stir), there are several ways to enhance the sweetness to your liking. You can increase the amount of honey or agave syrup used in the recipe. Alternatively, try using different sweeteners like maple syrup or coconut sugar for a unique taste. Adding fresh fruit, such as muddled strawberries or raspberries, can also heighten the sweetness while introducing
Delightful Strawberry Basil Mocktail Spritz Recipe for Refreshment

Picture this: it’s a sunny afternoon, and you’re lounging on your patio, feeling the gentle breeze on your face. You take a sip of a refreshing drink bursting with the sweet aroma of strawberries intermingled with the earthy notes of fresh basil. That’s right, you just whipped up a delightful Strawberry Basil Mocktail Spritz, a drink that is as refreshing as it is photogenic. Whether you’re hosting a barbecue, relaxing by the pool, or simply spoiling yourself during a much-deserved break, this mocktail will be the highlight of your day, enchanting your taste buds with every fizz. Now, let me take you back to summer days spent in my grandmother’s garden, where strawberries and basil grew like old friends. She would toss them together for all kinds of culinary wonders, but nothing quite beats sipping her signature mocktail on a hot day. This vibrant drink perfectly balances sweetness with that aromatic hint of basil, making it an ideal companion for lazy afternoons or lively gatherings. Get ready to be hooked on this refreshing experience; it’s like a garden party in a glass! Ingredients for Strawberry Basil Mocktail Spritz Here’s what you’ll need to make this delicious Strawberry Basil Mocktail Spritz: 1 cup fresh strawberries – Make sure they are hulled and sliced for the best flavor and presentation. Choose ripe, sweet strawberries for optimal taste. 10 leaves fresh basil – Torn basil leaves release their aromatic oils, enhancing the drink’s flavor profile. Look for bright, green leaves as a freshness indicator. 2 tablespoons honey – This natural sweetener pairs harmoniously with the strawberries and basil. Honey lends a smooth sweetness, but feel free to use agave syrup as an alternative. 1 cup sparkling water – Chilled sparkling water creates that delightful fizz. You can substitute with flavored sparkling water for an extra layer of flavor. 1 cup ice cubes – Ice is essential for keeping your drink cool and refreshing. How to Make Strawberry Basil Mocktail Spritz Follow these simple steps to prepare this delicious Strawberry Basil Mocktail Spritz: Step 1: Prepare the Ingredients Start by gathering all your ingredients on a clean counter. Slice the strawberries and tear the basil leaves gently with your fingers to enhance their flavor. Step 2: Muddle the Ingredients In a pitcher, combine the sliced strawberries and the torn basil leaves. Now, using a muddler or the back of a wooden spoon, press down gently to release the juices. Imagine you’re having a dance-off with the fruits, coaxing the most flavors out of them. Step 3: Sweeten It Up Add the honey (or agave syrup) to the muddled mixture. Stir it in well, making sure to dissolve the honey completely and blend it with the fruity goodness. Step 4: Add the Sparkling Water Slowly pour in the chilled sparkling water. Give it a gentle stir to mix all those glorious flavors together without losing all the fizz. Step 5: Serve Over Ice Fill individual glasses with ice cubes and pour the mocktail mixture over the ice. Make it as festive as you like—feel free to garnish with extra basil leaves or a slice of strawberry for a pop of color. Step 6: Enjoy Your Creation Raise your glass high and savor your Strawberry Basil Mocktail Spritz. It’s time to revel in the deliciousness you’ve just created. Cheers to you! Perfecting Strawberry Basil Mocktail Spritz Cooking Process Start by muddling your strawberries and basil together to release their delicious juices. Then, gently mix in the honey before adding the sparkling water. This ensures a beautiful infusion of flavors with each refreshing sip. Add Your Touch to Strawberry Basil Mocktail Spritz Feel free to swap out strawberries for other berries, like raspberries or blueberries. You could also try adding a splash of lime or using mint instead of basil for a refreshing twist. Storing & Reheating Strawberry Basil Mocktail Spritz While best enjoyed fresh, you can store any leftovers in the fridge for a day. Just keep it in an airtight container to preserve its fizzy goodness, but avoid reheating as it’s meant to be served cold. Sharing this Strawberry Basil Mocktail Spritz recipe always brings back memories of a sunny afternoon with friends. Their delighted faces when I handed them the first sip made me realize I was on to something special. FAQs About Strawberry Basil Mocktail Spritz What is Strawberry Basil Mocktail Spritz? The Strawberry Basil Mocktail Spritz is a refreshing beverage that combines the sweet flavor of fresh strawberries with the aromatic essence of basil, all topped off with sparkling water. This delightful drink is perfect for warm weather gatherings or simply to indulge in a guilt-free treat at home. The combination of fresh ingredients not only makes it a visually appealing drink but also a healthy alternative to sugary cocktails. You can enjoy it anytime, especially when you’re looking for something non-alcoholic yet fancy. How do I customize my Strawberry Basil Mocktail Spritz? Customization is part of the fun! You can swap out strawberries for other seasonal fruits like raspberries, blueberries, or even peaches. For an added citrus twist, consider squeezing in some fresh lime juice or even tangerine. If you’re feeling adventurous, replace basil with mint for a refreshing spin on the classic. The beauty of the Strawberry Basil Mocktail Spritz lies in its versatility, so let your creativity run wild and find what combination suits your taste buds perfectly! Can I make Strawberry Basil Mocktail Spritz ahead of time? While the Strawberry Basil Mocktail Spritz is best enjoyed fresh, you can prepare some components in advance. You can muddle the strawberries and basil and store them in the fridge for a few hours before serving. However, keep the sparkling water separate until you’re ready to serve for the fizz factor. Mixing all elements together prior to serving can cause the fizz to diminish, resulting in a less refreshing drink. So, prior preparation is great, but assembly should happen right before enjoying. What occasions are perfect for serving Strawberry Basil
Delicious Vanilla Cold Brew Recipe for Refreshing Summer Sips

A crisp morning, the sun peeking through your window, and a newfound love for cold coffee – could there be a better way to kick off your day? The delectable Vanilla Cold Brew is not just a drink; it’s a refreshing ritual that transforms your mundane morning routine into a delightful experience. Imagine a sip so smooth, it dances on your taste buds while the hint of vanilla wraps you in a cozy embrace—perfect for those moments when the weather is warm, and all you want is something cool and invigorating. Now, let me take you on a little journey. Picture this: you’re lounging on your patio on a sunny weekend, the breeze lightly tousling your hair, and your weekend brunch spread out before you. That’s when the Vanilla Cold Brew shines! This easy-to-make beverage not only impresses with its luscious flavor but also leaves plenty of room for creativity. So grab your coffee grounds and let’s dive into this wonderfully simple yet totally satisfying recipe that’s bound to become your summertime staple. Ingredients for Vanilla Cold Brew Here’s what you’ll need to make this delicious Vanilla Cold Brew: 1 cup Coarsely ground coffee – Choose your favorite coffee blend for the best flavor; the coarser the grind, the smoother the brew. 4 cups Cold water – Use filtered water for the purest taste; this helps in enhancing the coffee’s natural flavors. 1 teaspoon Vanilla extract – A high-quality vanilla extract elevates the drink and adds a delightful aroma. Sweetener of choice – Adjust to taste; sugar, honey, or a sugar substitute can make your drink perfectly sweetened. 1 cup Milk or cream – This is for richness; feel free to use almond milk, oat milk, or dairy cream based on your preference. Ice cubes – Essential for serving; it keeps your drink frosty and refreshing. How to Make Vanilla Cold Brew Follow these simple steps to prepare this delicious Vanilla Cold Brew: Step 1: Combine Ingredients In a large container, mix the coarsely ground coffee with the cold water. Stir it gently to ensure all the coffee grounds are saturated. This is where the magic starts! Step 2: Steep in the Fridge Cover the container and let it steep in the refrigerator for 12 to 24 hours. If you’re in a rush, 12 hours will do, but for a more robust flavor, why not wait for the full 24? Step 3: Strain the Coffee After steeping, it’s time to strain the brew! Use a fine mesh sieve or a coffee filter to separate the liquid from the coffee grounds. This step is crucial to avoid any gritty bits in your drink. Step 4: Add Vanilla and Sweetener Once the coffee is strained, stir in the vanilla extract and your choice of sweetener. Taste test to find your perfect balance of rich flavor and desirable sweetness. Step 5: Serve Over Ice Fill your favorite glass with ice cubes and pour the cold brew over them. Add milk or cream to taste, and stir gently to create a beautiful swirl of coffee and creamy goodness. Step 6: Enjoy! Take a moment to admire your creation, then sit back, relax, and enjoy the smooth, invigorating flavor of your homemade Vanilla Cold Brew. This drink isn’t just a beverage; it’s a summer celebration in a glass! Now that you know how to craft your own Vanilla Cold Brew, it’s time to indulge and enjoy the brisk flavors of everyone’s favorite cold drink. Whether you sip it leisurely on a lazy Sunday or bring it to work for a dose of refreshment, it’s a treat worth every step. And as the days grow longer and the sun shines brighter, this delightful brew is sure to keep you cool and caffeinated like a pro. So raise your glass, it’s time to toast to coffee, summer, and all the delicious moments that lie ahead! This showstopping Vanilla Cold Brew delivers restaurant-quality results using simple ingredients you probably already have at home. The perfect balance of textures and flavors creates an unforgettable dining experience that will have everyone asking for seconds. Picture-perfect presentation with vibrant colors makes this dish absolutely Instagram-worthy and guaranteed to impress any dinner guest. Incredibly versatile recipe that works beautifully for weeknight dinners, meal prep, special occasions, or even outdoor entertaining sessions. Perfecting Vanilla Cold Brew Cooking Process Start by combining coarsely ground coffee and cold water in a large container. Allow it to steep in the refrigerator for 12 to 24 hours for optimal flavor extraction. Once steeped, strain the mixture, add vanilla extract, and sweetener to taste, then serve over ice. Add Your Touch to Vanilla Cold Brew You can customize your Vanilla Cold Brew by adding a splash of almond milk instead of regular milk or even experimenting with flavored syrups like hazelnut or caramel. For an extra touch, sprinkle cinnamon on top before serving. Storing & Reheating Vanilla Cold Brew Store any leftover Vanilla Cold Brew in the refrigerator for up to a week. Pour it over ice when ready to serve. Since it’s served cold, reheating isn’t required and wouldn’t benefit the flavor. I remember the first time I made Vanilla Cold Brew for a summer barbecue. Friends couldn’t stop raving about it and insisted I share the recipe. That day, I realized I had stumbled upon a new favorite summer classic! FAQs About Vanilla Cold Brew What is Vanilla Cold Brew? Vanilla Cold Brew is a smooth and refreshing coffee beverage made by steeping coarsely ground coffee in cold water for an extended period. Unlike traditional hot brewing methods, this technique results in a coffee that is less acidic and more flavorful. The addition of vanilla extract enhances its sweetness and aroma, making it a perfect drink for warm days. Enjoy it over ice with milk or cream for a delightful treat that keeps you cool and energized. How do I make Vanilla Cold Brew? To make Vanilla Cold Brew, start by combining one cup of
Delicious Onion Boil Recipe: A Flavorful Side Dish in 25 Minutes
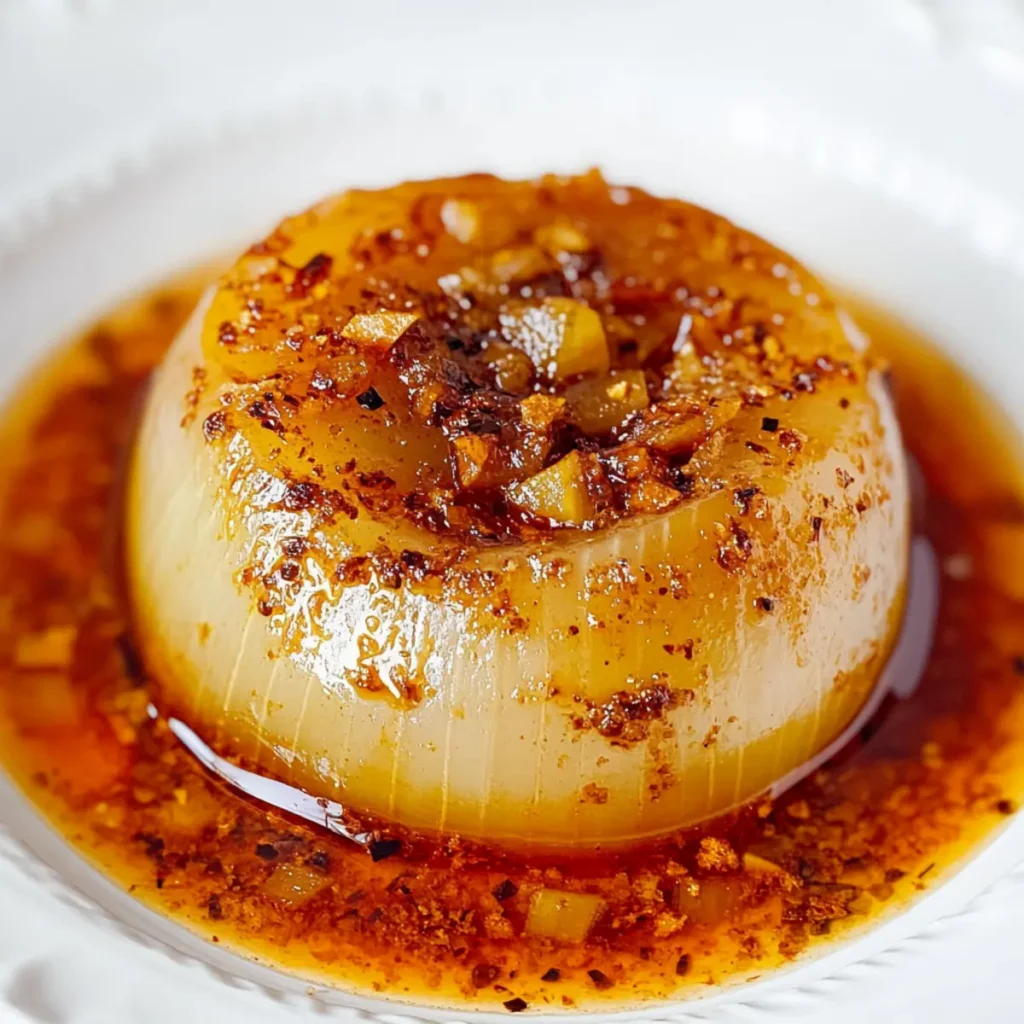
Onion Boil is one of those magical dishes that can transform a simple meal into an extraordinary culinary experience. Picture this: tender, juicy sweet onions bathing in a fragrant garlic butter sauce, infused with fresh herbs that dance on your taste buds. Every bite delivers the perfect balance of sweetness and garlic goodness—a dish that feels like a warm hug on a chilly day. This delightful treat is perfect for gatherings, cozy family dinners, or even a spontaneous weeknight indulgence. The aroma alone has the power to whisk you away to a bustling farmer’s market where the air is thick with savory scents and laughter. Can you hear it calling your name? Join me in this delightful culinary journey, and let’s uncover the secrets behind this amazing Onion Boil recipe. Ingredients for Onion Boil Here’s what you’ll need to make this delicious Onion Boil: 4 medium Sweet onions – The star ingredient! Sweet onions provide a delicate sweetness that perfectly complements the garlic and herbs. Look for ones that feel firm and heavy for their size. enough to submerge Water – You’ll need sufficient water to fully cover the onions as they cook, allowing them to become tender and flavorful. 1 tablespoon Salt – This simple ingredient enhances the sweetness of the onions and ensures they are perfectly seasoned. 2 tablespoons Butter – Use unsalted butter for a rich, creamy flavor that blends beautifully with the garlic and fresh herbs. 3 cloves Garlic cloves – Fresh garlic will add an incredible aroma and depth of flavor, elevating the dish to new heights. 2 tablespoons Fresh herbs – Use your favorite herbs like parsley, thyme, or basil. Fresh herbs add brightness and complexity to the dish. How to Make Onion Boil Follow these simple steps to prepare this delicious Onion Boil: Step 1: Boil the Water Start by bringing a large pot of water to a rolling boil. Make sure you have enough water to completely submerge the onions—no half measures here. Step 2: Cook the Onions Once the water is boiling, gently drop in the sweet onions along with the tablespoon of salt. Let them cook for about 15 minutes or until they’re fork-tender. The aroma will start to make your mouth water! Step 3: Prepare the Garlic Butter While the onions are cooking, grab a separate pan and melt the butter over medium heat. Once it’s melted, toss in the minced garlic and sauté until it becomes fragrant. You want to breathe deep at this moment because it’ll smell amazing. Step 4: Drain the Onions Once the onions are tender, carefully drain them in a colander. Take a moment to admire their beautiful golden color—it’s like nature’s art! Step 5: Combine with Garlic Butter Return the drained onions to the pot and pour the garlic butter mixture over them. Gently toss to coat every onion with that heavenly sauce. Step 6: Add Fresh Herbs Sprinkle your selected fresh herbs over the coated onions and mix well. This is your chance to let creativity shine—feel free to throw in some red pepper flakes if you’re feeling spicy! Serve the Onion Boil warm, perhaps alongside some crusty bread for dipping, or as an exquisite side dish to accompany your favorite main course. This dish is a show-stopper, and who knows—you might just convince your friends that you were born with a chef’s hat on your head! Enjoy! Perfecting Onion Boil Cooking Process Start by boiling the water to prepare the sweet onions. Once boiling, add the onions and salt. While they cook, melt butter and sauté garlic in a separate pan. This ensures everything finishes perfectly and stays flavorful. Add Your Touch to Onion Boil Consider adding a splash of white wine or a sprinkle of chili flakes for an extra kick. You can also swap sweet onions for red or yellow onions, or even add vegetables like asparagus for more variety. Storing & Reheating Onion Boil Store any leftovers in an airtight container in the fridge for up to three days. To reheat, gently warm in a skillet over low heat, adding a bit of water or broth to maintain moisture. It was one of those evenings when I surprised my family with dinner after a long day. Their wide eyes and smiles when they tasted the Onion Boil made every minute spent in the kitchen worth it. FAQs About Onion Boil What is Onion Boil? Onion Boil is a delightful side dish that elevates the humble onion to gourmet status. This simple yet flavorful preparation involves boiling sweet onions until tender and then tossing them in a garlic butter sauce with fresh herbs. The result is a dish bursting with savory sweetness and aromatic notes, perfect as a complement to any main course. With only a handful of ingredients, it showcases how basic cooking techniques can yield impressive results that are easy to achieve at home. How can I customize my Onion Boil? Customizing your Onion Boil is easy and can enhance the dish to suit your taste. You may add a splash of white wine or a pinch of red pepper flakes for an exciting twist. Consider swapping sweet onions for red or yellow varieties to introduce different flavor profiles. Mixing in seasonal vegetables like asparagus or carrots not only diversifies the taste but also adds colorful elements to your plate, making it visually appealing. Can I store leftover Onion Boil? Yes, you can store leftover Onion Boil in an airtight container in the refrigerator for up to three days. Just make sure to let it cool completely before sealing it up. To reheat, gently warm the onions in a skillet over low heat, adding a splash of water or broth. This will revitalize the dish and prevent it from drying out. Perfect for meal prep, it’s just as delicious the next day! How long does it take to prepare Onion Boil? Making Onion Boil is a breeze, taking just about 25 minutes from start to finish.
Delicious Steak Crostini Recipe for Effortless Appetizers

Steak Crostini is more than just a fancy appetizer; it’s a culinary canvas where juicy steak meets crunchy bread, creating a delightful explosion of flavors and textures in every bite. Picture this: the aroma of freshly baked baguette mingling with the rich, sumptuous scent of sizzling steak, promising a taste that dances on your palate, leaving you craving more. Perfect for gatherings, cozy dinners, or simply indulging in a little self-care, these delightful bites elevate any occasion to gourmet status. What makes Steak Crostini truly special isn’t just the incredible flavors but also the stories we weave around them. I recall the time I whipped these up for a spontaneous gathering with friends, and as the crostini hit the table, laughter bubbled over like a well-shaken soda. Everyone was so entranced by the delicious bites that we completely forgot about the TV in the background; it was just us, good food, and great memories being made. If you’re ready for an unforgettable flavor experience that will have your friends and family raving, let’s dive into this delectable journey! Ingredients for Steak Crostini Here’s what you’ll need to make this delicious Steak Crostini: 1 French baguette – A crusty baguette provides the perfect base; slice it into 1/2-inch pieces for optimal crunch. 8 oz sirloin or ribeye steak – Choose a tender cut that ensures juicy bites; ribeye is particularly flavorful. 2 tbsp olive oil – This adds richness and aids in achieving that lovely golden-brown crust on the bread and steak. 2 cloves garlic – Freshly minced, garlic adds depth and aromatic qualities that elevate the overall flavor. 1/4 cup fresh parsley or basil – Fresh herbs bring bright notes to balance the richness of the steak. 1/4 cup balsamic glaze – This sweet and tangy drizzle rounds out the dish, adding a gourmet touch to your crostini. How to Make Steak Crostini Follow these simple steps to prepare this delicious Steak Crostini: Step 1: Preheat the Oven Start by preheating your oven to 400°F (200°C). While the oven warms up, arrange your baguette slices on a baking sheet and brush both sides generously with olive oil, ensuring they’re well-coated for that perfect golden color. Step 2: Bake the Baguette Pop the baking sheet into your preheated oven and let the baguette slices bake for about 5 minutes, or until they turn golden brown. Your kitchen will fill with the tantalizing scent of toasting bread—trust me, it’s irresistible! Step 3: Sear the Steak While the bread bakes, season your steak with a generous pinch of salt and pepper. Heat a skillet over medium-high heat and add a splash of olive oil. Once it’s shimmering, sear the steak for about 4-5 minutes on each side for that perfect medium-rare doneness. Let the steak rest on a cutting board to retain its juices before slicing it thinly against the grain. Step 4: Prepare the Garlic Herb Mixture In a small bowl, mix together the minced garlic and chopped parsley or basil. This delightful mixture will not only offer a pop of color but also bring in fresh aromas that complement the rich steak beautifully. Step 5: Assemble the Crostini Once the baguette slices have cooled slightly, top each one with a slice of steak and a generous sprinkle of the garlic herb mix. Drizzle balsamic glaze over the top—feel free to be generous here; this is where the magic happens! Step 6: Serve and Enjoy Transfer your assembled Steak Crostini to a serving platter. Take a moment to admire your handiwork—you’ve created something wonderful! Serve fresh, and watch as everyone devours these elegant bites. Whether it’s a dinner party or a cozy night in, you’ve just made a stunning appetizer that’ll impress and satisfy. Now that you know how to whip up this savory Steak Crostini, get ready to bask in the praise that’s sure to come your way. Your friends might start thinking you’ve taken culinary classes! Enjoy every laugh, every delicious bite, and remember that nothing brings people together quite like food—especially when it’s this delightful. Happy cooking! Perfecting Steak Crostini Cooking Process Start by preheating your oven while you prepare the baguette. Sear the steak second to lock in those juicy flavors. Bake the baguette slices until golden brown, then assemble your crostini for the best results. Add Your Touch to Steak Crostini Feel free to experiment with different herbs, like rosemary or thyme. Swap out the balsamic glaze for a zesty chimichurri, or add a sprinkle of blue cheese for an extra punch of flavor. Your creativity can truly shine here. Storing & Reheating Steak Crostini Store any leftovers in an airtight container in the fridge for up to two days. Reheat the crostini in the oven at 350°F for a few minutes until warmed through, ensuring crispiness is preserved. Sharing a memorable evening, I once surprised friends with this Steak Crostini, and their delighted reactions made it an unforgettable culinary moment. They couldn’t believe how simple yet elegant the dish was, and requests for the recipe started pouring in! FAQs About Steak Crostini What is Steak Crostini? Steak Crostini is a delightful appetizer that pairs tender, flavorful steak with crispy toasted bread, often a French baguette. Each bite offers a harmony of textures and tastes, topped with a vibrant herb mixture and a drizzle of balsamic glaze. It’s not just delicious; it’s also visually stunning, making it a perfect choice for entertaining guests or indulging in a gourmet experience at home. How can I customize my Steak Crostini? You can customize your Steak Crostini in many ways! Start by experimenting with different cuts of meat; flank and filet mignon work beautifully. For toppings, consider blue cheese or goat cheese for a creamy texture or swap out the balsamic glaze for a zesty chimichurri. Changing the herbs can also add a unique flair—basil and rosemary are both excellent options! Can I make Steak Crostini ahead of time? While preparing Steak Crostini ahead of time can be convenient,
Delicious Southwest Egg Rolls Recipe for Quick Appetizers

Imagine biting into a crispy, golden-brown Southwest egg roll that’s bursting with the savory goodness of shredded chicken, spicy black beans, and sweet corn. The bold flavors mingle delightfully, creating a culinary explosion that dances on your taste buds. You can practically hear the crunch as you take that first bite, and the heavenly aroma will have your friends and family flocking to the kitchen faster than you can say “appetizer!” Now, picture this: it’s game day, and your best pals are gathered around, eagerly awaiting something tantalizing to munch on while cheering for their team. The stress of the day fades away as you pull these delightful Southwest egg rolls from the oven, golden and glossy – a feast for the eyes and a delight for the tongue. This recipe isn’t just about the food; it’s about the laughter, the camaraderie, and the taste of pure indulgence. Ingredients for Southwest Egg Rolls Here’s what you’ll need to make this delicious Southwest Egg Rolls: 2 cups cooked, shredded chicken – Use rotisserie chicken for easy prep or any leftover cooked chicken you have on hand. 1 can (15 oz) black beans – Rinse well to remove excess sodium and enhance the flavor. 1 cup frozen corn – This adds a touch of sweetness and a pop of color. No need to thaw – just toss it in! 1 cup diced bell peppers – Use a mix of red and green for a vibrant look and a mix of flavors. 1/2 cup chopped green onions – These provide a fresh crunch and a mild onion flavor. 4 large flour tortillas – Opt for extra-large tortillas to hold all the delicious filling. 1 tsp cumin – A warming spice that adds depth to the flavors. 1 tsp chili powder – For a hint of heat without overwhelming the flavor profile. 1 tsp garlic powder – Garlic is always a welcome addition, elevating any dish. Cooking spray – For a crisp finish and to prevent sticking when baking. 1/2 cup sour cream – This creamy element pairs perfectly with the spiced egg rolls for dipping. 1/4 cup salsa – Use your favorite variety to add an extra kick to the sauce. How to Make Southwest Egg Rolls Follow these simple steps to prepare this delicious Southwest Egg Rolls: Step 1: Preheat the oven Begin by preheating your oven to 400°F (200°C). This ensures that your egg rolls bake evenly and achieve that golden-brown perfection we all crave. Step 2: Sauté the filling In a skillet, heat a drizzle of oil over medium heat. Add the shredded chicken, cooking it until it’s heated through. Stir in the black beans, corn, diced bell peppers, and spices, mixing everything well so the flavors meld together beautifully. Step 3: Prepare the tortillas Lay out the flour tortillas on a clean surface. Spoon about two tablespoons of the savory filling onto each tortilla, making sure not to overfill as tempting as it may be – we want the egg rolls to seal properly. Step 4: Roll them up Carefully roll each tortilla tightly, starting from one edge and tucking in the filling as you go, until the entire tortilla is wrapped around the goodness. Place the rolled egg rolls seam-side down on a parchment-lined baking sheet to keep things tidy. Step 5: Bake to perfection Lightly spray the top of the egg rolls with cooking spray to help them crisp up. Bake them in the preheated oven for about 20 minutes, or until they are golden and crispy. The aroma wafting through your kitchen will have everyone peeking in to see what’s cooking. Step 6: Make the dipping sauce While the egg rolls bake, mix together the sour cream and salsa in a small bowl. This creamy, zesty sauce is the perfect complement to the spicy, savory egg rolls. When the timer goes off, and you pull those gorgeous Southwest Egg Rolls from the oven, your kitchen will be filled with a tantalizing aroma that signals good times ahead. Serve them warm, with your dipping sauce on the side and maybe some extra salsa if you dare! Enjoy the smiles and laughter as you bite into these fantastic treats. Each egg roll is a small adventure, packed with flavor, warmth, and a spirit of togetherness that makes every gathering a little brighter. Perfecting Southwest Egg Rolls Cooking Process Start by preheating your oven while you prep the filling. Sear the chicken and sauté the veggies in a skillet to bring out their flavors. Then, roll the filling tightly in the tortillas before baking them to golden perfection. Add Your Touch to Southwest Egg Rolls Feel free to swap out the chicken for turkey or roasted vegetables for a vegetarian version. Add jalapeños for a spicy kick or some cheese for extra creaminess if you’re feeling indulgent. Storing & Reheating Southwest Egg Rolls Store leftover egg rolls in an airtight container in the fridge for up to three days. Reheat in the oven at 350°F for 10-15 minutes for the best crispiness, avoiding the microwave if possible. Sharing these Southwest Egg Rolls with friends on game night turned into a delightful culinary adventure, with everyone raving about how golden and crispy they turned out. FAQs About Southwest Egg Rolls What are Southwest Egg Rolls? Southwest Egg Rolls are a delicious appetizer that blends the flavors of traditional Southwestern cuisine into a finger food treat. They typically feature a filling of shredded chicken, black beans, corn, and diced bell peppers, all seasoned with spices like cumin and chili powder. These ingredients are wrapped tightly in flour tortillas, then baked until crispy and golden. The rolls are often served with a zesty dipping sauce, making them perfect for parties or casual gatherings. How do I make Southwest Egg Rolls crispy? To achieve the perfect crispiness for your Southwest Egg Rolls, it’s important to bake them at the right temperature and for the appropriate duration. Preheating your oven to 400°F helps
Delicious Loaded Smashed Potatoes Recipe Perfect for Any Meal

When it comes to comfort food, Loaded Smashed Potatoes steal the spotlight with their buttery goodness and indulgent toppings that transform a simple side into a star dish. Imagine sitting down to a warm plate of crispy, golden potatoes, oozing with melted cheese and topped with savory bacon bits and fresh green onions—it’s like a flavor party on your plate, and everyone’s invited. These Loaded Smashed Potatoes are more than just a delicious side; they’re a nostalgic reminder of family gatherings where laughter mingled with the irresistible aroma wafting from the kitchen. Whether you’re hosting a casual dinner or enjoying a cozy night in, this recipe is a must-try, promising to elevate any meal with its delightful crunch and savory charm. Ingredients for Loaded Smashed Potatoes Here’s what you’ll need to make this delicious Loaded Smashed Potatoes: 1 lb baby potatoes – These little gems are perfect for smashing and create a delightful crispy texture once baked. Look for firm potatoes that fit snugly in your hands. 3 tbsp olive oil – You’ll need this for drizzling over the potatoes to achieve that golden brown and crunchy exterior. Extra virgin olive oil adds a hint of richness. 1 cup shredded cheddar cheese – The star of the show! Use sharp cheddar for a more intense flavor, or mix in Monterey Jack for a creamy twist. ½ cup crispy bacon bits – Because everything’s better with bacon, right? You can use store-bought or pan-fry your own for an extra layer of flavor. ¼ cup chopped green onions – Bright and fresh, these add a pop of color and a zing to balance the richness of the cheese and bacon. 1 tsp garlic powder – For that essential depth of flavor; it infuses the potatoes with a delightful aroma. Salt and pepper to taste – Don’t forget the seasoning to enhance all the delicious flavors in the dish. How to Make Loaded Smashed Potatoes Follow these simple steps to prepare this delicious Loaded Smashed Potatoes: Step 1: Preheat the Oven Preheat your oven to 450°F (230°C). This high temperature will ensure that your potatoes get crispy on the outside while remaining fluffy on the inside—a match made in potato heaven. Step 2: Boil the Potatoes In a large pot of salted water, add the baby potatoes and bring them to a boil. Let them cook until fork-tender, about 15-20 minutes. Once they’re tender, drain and let them cool slightly. Step 3: Smash the Potatoes Place the boiled potatoes on a lined baking sheet. Using a fork or a potato masher, gently smash each potato down to about half an inch thick. Think of it as giving your potatoes a little tough love—the more crannies and crevices, the better they’ll crisp up. Step 4: Season and Drizzle Drizzle the smashed potatoes with olive oil, sprinkle with garlic powder, and generously season with salt and pepper. Toss lightly so every potato gets a taste of that heavenly oil. Step 5: Bake Until Crispy Bake your potatoes in the preheated oven for 25-30 minutes, or until they are golden brown and crispy. The key here is patience; you want that delightful crunch. Step 6: Add Toppings and Serve Remove the potatoes from the oven and generously top with shredded cheese and crispy bacon bits. Return them to the oven for an additional 5 minutes, or until the cheese is melted and bubbling. Sprinkle with fresh green onions just before serving for that final touch of brightness. Now grab yourself a plate, serve up those Loaded Smashed Potatoes, and enjoy a mouthful of deliciousness that perfectly balances crunch with rich and savory toppings. Whether it’s a side dish or the main event, these potatoes are sure to impress! Perfecting Loaded Smashed Potatoes Cooking Process To master Loaded Smashed Potatoes, begin by boiling the potatoes until tender. While they cool, preheat your oven. Gently smash the potatoes on a baking sheet before seasoning and baking for crispy perfection. Add Your Touch to Loaded Smashed Potatoes Feel free to customize Loaded Smashed Potatoes with different cheese, spices, or add-ins. Consider mixing in jalapeños for heat, or try a blend of cheeses like mozzarella and gouda for a creamy twist. Storing & Reheating Loaded Smashed Potatoes Store any leftovers of Loaded Smashed Potatoes in an airtight container in the refrigerator for up to three days. Reheat in the oven at 350°F until warmed through and crispy, to maintain that crunchy texture. Cooking these Loaded Smashed Potatoes for the first time turned into a family celebration, with everyone raving about their crispy edges and creamy insides. Their smiles made every minute spent worth it. FAQs About Loaded Smashed Potatoes What is Loaded Smashed Potatoes? Loaded smashed potatoes are a delicious twist on traditional baked potatoes, showcasing crispy edges combined with creamy interiors, and topped with mouthwatering ingredients. This dish kicks up comfort food a notch with all the delightful fixings you can imagine, from cheese and bacon to green onions. Perfect as a side dish or a main course, loaded smashed potatoes are ideal for any meal, bringing a fun and flavorful element to your dinner table that will have everyone smiling. How can I customize my Loaded Smashed Potatoes? Customization is part of the fun with loaded smashed potatoes. Feel free to switch out the toppings based on your flavor preferences! Try using different types of cheese such as mozzarella or feta. To spice things up, add diced jalapeños or even hot sauce. For a vegetarian option, load them up with sautéed mushrooms and spinach. The sky is the limit when it comes to personalizing this dish to fit your taste buds! Can I make Loaded Smashed Potatoes in advance? Yes, you can absolutely make loaded smashed potatoes ahead of time. Prepare the dish until the baking step, then cover and refrigerate it for up to 24 hours. When you’re ready to serve them, simply pop them in the oven. This makes it a fantastic option for meal
Easy Chicken Charcuterie Board Recipe for Gatherings and Parties

There’s something undeniably captivating about a Chicken Charcuterie Board that beckons you to gather ‘round with friends and family. Imagine succulent chicken breasts, glistening with a golden marinade, juxtaposed against a vibrant array of colorful accompaniments – it’s a feast for the eyes as much as for the palate. Perfect for gatherings, this delicious Chicken Charcuterie Board transforms everyday ingredients into an extraordinary culinary experience that brings everyone together. Whether you’re hosting a casual gathering, a cozy date night, or simply want to elevate your meal prep game, this Chicken Charcuterie Board will charm the socks off your guests. Prepare for an explosion of flavors – you’ll be greeted with the warm aroma of grilled chicken mixed with the sweet and tangy marinade, making it impossible to resist snacking right from the board. Ingredients for Chicken Charcuterie Board Here’s what you’ll need to make this delicious Chicken Charcuterie Board: 4 boneless, skinless chicken breasts (1.5 lbs) – Tender and juicy options that grill beautifully, soak up flavors, and are perfect for slicing. 3 cloves fresh garlic, minced – Adds a punch of flavor. Fresh is best for maximum aroma and taste. 2 tbsp honey – Provides natural sweetness that balances the savory notes in the dish. 2 tbsp freshly squeezed lemon juice – Brightens the marinade and adds a refreshing zest. Use fresh lemons for the best flavor. 3 tbsp extra virgin olive oil – Enhances richness and helps with grilling while adding some heart-healthy fats. 1/4 cup low-sodium soy sauce – Provides a savory depth without being overly salty, making this a balanced marinade. 2 tbsp Dijon mustard – It adds a sophisticated tang, creating a flavor profile that’s rich and layered. How to Make Chicken Charcuterie Board Follow these simple steps to prepare this delicious Chicken Charcuterie Board: Step 1: Make the Marinade In a bowl, mix olive oil, honey, soy sauce, Dijon mustard, minced garlic, and lemon juice. This marinade will coat the chicken, infusing it with flavor and making it irresistible. Step 2: Marinate the Chicken Place the chicken breasts in a resealable bag or shallow dish, and pour the marinade over them. Seal and refrigerate for at least 30 minutes. This is where the magic happens; the flavors meld beautifully, penetrating the meat. Step 3: Preheat the Grill or Skillet Get your grill or skillet heated to medium-high. Your kitchen should now be smelling like a culinary dream as the anticipation builds! Step 4: Cook the Chicken Cook the chicken for about 6-7 minutes per side until it reaches an internal temperature of 165°F (75°C). The outside should be golden and slightly crispy while the inside remains juicy. Step 5: Let It Rest After cooking, transfer the chicken onto a cutting board and let it rest for five minutes. This allows the juices to redistribute, ensuring each bite is perfectly succulent. Step 6: Slice and Assemble Slice the chicken into bite-sized pieces and arrange it artfully on a serving board. Elevate your display with accompaniments like cheese, crackers, fresh fruits, and drizzle any remaining warmed marinade over the top. Now, gather your loved ones, and serve this Chicken Charcuterie Board with a flourish! It’s not just a meal but an experience – one that invites everyone to engage in a bit of culinary adventure. Enjoy! With this Chicken Charcuterie Board, you’re not only creating a dish that’s delightful to the taste buds but also an atmosphere that celebrates togetherness. So, ready the grill, gather those ingredients, and prepare yourself for a flavorful journey that’s sure to become a staple in your entertaining repertoire. Enjoy every bite, and don’t forget to snap a picture for Instagram – after all, a creation this fabulous deserves to be documented! This showstopping Chicken Charcuterie Board delivers restaurant-quality results using simple ingredients you probably already have at home. The perfect balance of textures and flavors creates an unforgettable dining experience that will have everyone asking for seconds. Picture-perfect presentation with vibrant colors makes this dish absolutely Instagram-worthy and guaranteed to impress any dinner guest. Incredibly versatile recipe that works beautifully for weeknight dinners, meal prep, special occasions, or even outdoor entertaining sessions. Perfecting Chicken Charcuterie Board Cooking Process Start by marinating the chicken while you prepare your accompaniments and gather your serving board. Sear the chicken for a delightful crust, then rest it to enhance moisture before slicing. Add Your Touch to Chicken Charcuterie Board Feel free to customize your Chicken Charcuterie Board! Swap chicken for grilled shrimp or veggies, and try different sauces or cheeses to cater to your tastebuds. Storing & Reheating Chicken Charcuterie Board To store leftover chicken, seal it in an airtight container in the fridge for up to three days. Reheat gently in a skillet to maintain moisture and flavor. I remember the first time I made this Chicken Charcuterie Board for a family gathering. My cousin Samantha declared it “the best chicken she’s ever had,” and I felt like a culinary genius, all thanks to some marinated goodness! FAQs About Chicken Charcuterie Board What is Chicken Charcuterie Board? A Chicken Charcuterie Board is an inviting and stylish way to serve chicken, accompanied by a variety of cheeses, crackers, fruits, and spreads. The chicken is marinated and cooked to flavorful perfection, then arranged beautifully on a serving board. This dish combines both elegance and fun, making it the perfect centerpiece for gatherings. Guests can enjoy an interactive dining experience, selecting their favorite pairings and creating their delightful bites. Whether for a party or a weeknight dinner, this board elevates your meal while keeping it relaxed and enjoyable. How do I customize my Chicken Charcuterie Board? Personalizing your Chicken Charcuterie Board is part of the fun! You can swap the chicken out for grilled shrimp, roasted vegetables, or even plant-based proteins. Experiment with different cheeses like sharp cheddar, creamy brie, or tangy goat cheese. For a twist, incorporate assorted dips and spreads, such as hummus or pesto. Add seasonal fruits like figs or berries and
Delicious Jalapeño Popper Cheese Ball Recipe for Easy Entertaining

Dive into the world of snacks with a delightful Jalapeño Popper Cheese Ball that will make your taste buds dance! Imagine a creamy blend of cheeses, aromatic spices, and the perfect kick from fresh jalapeños, delivering a flavor explosion that is, quite frankly, irresistible. Gather your friends and family because this crowd-pleaser is the perfect addition to game nights, parties, or just a cozy evening in. You won’t believe how a few simple ingredients can create something so mouthwatering. Whether you’re an experienced home chef or someone who’s just tired of fast food, this Jalapeño Popper Cheese Ball is meant for you. It’s a fantastic way to show off your culinary skills without spending hours in the kitchen. Picture it: your friends take one bite and their faces light up with joy. Just wait for the “Mmm” sounds as they reach for more, leaving them charmed and asking for the recipe. Get ready – this cheese ball will steal the show! Ingredients for Jalapeño Popper Cheese Ball Here’s what you’ll need to make this delicious Jalapeño Popper Cheese Ball: 8 oz cream cheese – Make sure this is softened to ensure easy mixing and a creamy texture. 1 cup shredded sharp cheddar cheese – Go for the sharpness for a rich, tangy flavor that pairs wonderfully with jalapeños. 2-3 fresh jalapeños – Decide on the quantity based on your heat tolerance; remove the seeds for a milder taste. 1/2 cup crumbled cooked bacon – Adds a smoky crunch that elevates the overall flavor profile of the cheese ball. 1/4 cup green onions – Offers a fresh, oniony crunch that brightens the cheese ball’s flavors. 1 tsp garlic powder – This ingredient boosts the savoriness and compliments the other elements beautifully. How to Make Jalapeño Popper Cheese Ball Follow these simple steps to prepare this delicious Jalapeño Popper Cheese Ball: Step 1: Prepare Your Ingredients Start by finely chopping jalapeños and green onions. Cook the bacon until it’s crispy and let it cool completely. This will ensure everything blends well and maintains a crunchy texture. Step 2: Mix the Cheeses In a large mixing bowl, combine the softened cream cheese and shredded cheddar cheese. Blend them together until you achieve a smooth and creamy consistency. Make sure no lumps remain, as lumpy cheese is never the goal. Step 3: Incorporate the Flavor** Stir in the chopped jalapeños, crumbled bacon, green onions, and garlic powder. Mix everything well and take a moment to taste the mixture, adjusting seasoning if necessary. You want to ensure that each bite is packed with flavor. Step 4: Shape the Cheese Ball With cleanliness in mind, use your hands to shape the cheese mixture into a ball. It doesn’t have to be perfect; rustic is charming! Place the ball onto a sheet of parchment paper for easier handling and cleanup. Step 5: Wrap and Chill Wrap the cheese ball tightly in plastic wrap, ensuring it’s well-sealed to keep it fresh. Place it in the refrigerator for at least 2 hours to firm up. This step is essential, as it helps the flavors meld together beautifully. Step 6: Serve and Enjoy Once chilled, remove the cheese ball from the refrigerator. Serve it on a platter with an array of crackers or fresh vegetables for dipping. Not only will this look gorgeous, but it will also make your guests feel fancy and appreciated! Now that you have the ultimate recipe for a Jalapeño Popper Cheese Ball, it’s time to gather your loved ones and dig in. This delightful cheese ball is not just a recipe; it’s an experience filled with laughter, conversation, and of course, cheers for seconds! You Must Know About Jalapeño Popper Cheese Ball This showstopping Jalapeño Popper Cheese Ball delivers restaurant-quality results using simple ingredients you probably already have at home. The perfect balance of textures and flavors creates an unforgettable dining experience that will have everyone asking for seconds. Picture-perfect presentation with vibrant colors makes this dish absolutely Instagram-worthy and guaranteed to impress any dinner guest. Incredibly versatile recipe that works beautifully for weeknight dinners, meal prep, special occasions, or even outdoor entertaining sessions. Perfecting Jalapeño Popper Cheese Ball Cooking Process To achieve culinary bliss, start by cooking your bacon until it’s crispy; this will lend a savory crunch. While it’s cooling, chop your jalapeños and green onions. Next, mix your cream cheese and cheddar until smooth, followed by adding the remaining ingredients. Shape your mixture, then chill. Add Your Touch to Jalapeño Popper Cheese Ball Get creative! Substitute the jalapeños for diced red bell peppers for sweetness or add a hint of ranch seasoning for an extra flavor boost. You can even roll the cheese ball in crushed nuts or herbs for added texture and visual appeal. Storing & Reheating Jalapeño Popper Cheese Ball Store any leftovers in an airtight container in the fridge for up to a week. For serving later, let it sit out to soften slightly before enjoying again. Resist the urge to freeze, as cheese balls don’t fare well in deep freeze. Sharing this cheese ball at a friend’s barbecue was a highlight. As I watched everyone go back for more, laughter filled the air, reminding me that good food brings people together. FAQs About Jalapeño Popper Cheese Ball What is Jalapeño Popper Cheese Ball? The Jalapeño Popper Cheese Ball is a delightful appetizer that combines the creamy texture of cream cheese with the bold flavors of cheddar cheese, fresh jalapeños, crispy bacon, and green onions. This crowd-pleasing dish is shaped into a ball and served with crackers or vegetables for dipping. It’s perfect for parties or casual gatherings and is sure to impress your guests with its unique taste and presentation. How do you serve Jalapeño Popper Cheese Ball? Serving a Jalapeño Popper Cheese Ball is easy and fun! Place it on a beautiful platter and surround it with an assortment of crackers, pretzels, or fresh cut vegetables, like carrots and bell peppers. You can also garnish the