
Juicy Cheeseburger Sliders Recipe for Easy Weeknight Meals

Juicy Cheeseburger Sliders are a little bite of heaven, guaranteed to set off fireworks in your mouth. Imagine sinking your teeth into tender beef nestled in a soft slider bun, with melted cheese oozing down like a warm hug from an old friend. Your taste buds are practically dancing with joy at this savory delight that’s perfect for any occasion, from casual family dinners to festive gatherings. Just the thought of them is enough to make your stomach growl and your heart race with anticipation! Every time I whip up a batch of these juicy gems, I’m transported back to summer cookouts where laughter fills the air, and the smell of grilling meat brings everyone together. These sliders are not just food; they’re a way of life. Whether you’re firing up the grill or cooking up a quick meal on a weekday night, these sliders are your ticket to satisfying deliciousness. So grab your apron and let’s dive into making some Juicy Cheeseburger Sliders that are sure to impress! Ingredients for Juicy Cheeseburger Sliders Here’s what you’ll need to make this delicious Juicy Cheeseburger Sliders: 1 lb ground beef (80/20) – This lean-to-fat ratio creates the perfect balance of flavor and juiciness, ensuring your sliders are not dry. 8 slider buns – Soft and ready to hold all those delicious toppings and patties, any brand will do, but go for fresh ones for best results. 4 slices sharp cheddar cheese – The sharpness of the cheddar cuts through the richness of the beef, providing a delightful flavor contrast. 1/2 cup dill pickles (sliced) – These add a zesty crunch that elevates the overall taste and brings everything together. 1/2 cup onion (sautéed) – When sautéed, onions turn sweet, adding another flavor dimension to your sliders. 2 tbsp ketchup – A classic condiment that lends sweetness and acidity, perfectly balancing the savory notes of the beef. 2 tbsp mustard – If you want a little tang, this is your go-to; you can pick yellow or spicy brown, depending on your mood. Salt and pepper to taste – Essential for enhancing the flavors of the other ingredients; don’t skip this step! How to Make Juicy Cheeseburger Sliders Follow these simple steps to prepare this delicious Juicy Cheeseburger Sliders: Step 1: Prepare Your Grill or Skillet Start by preheating your grill or skillet to medium-high heat, around 375°F. Make sure your cooking surface is hot enough to sear those patties perfectly. Step 2: Form the Patties In a large bowl, gently mix the ground beef with salt and pepper. Don’t overdo it; just enough to season. Shape the mixture into eight small patties, making them slightly larger than the buns, as they’ll shrink a bit while cooking. Step 3: Cook the Patties Place your patties on the hot grill or skillet. Cook them for about 3 minutes on each side, or until they reach your desired level of doneness. Remember, a little caramelization goes a long way in flavor! Step 4: Add the Cheese In the final minute of cooking, add a slice of cheddar cheese to each patty and cover them with a lid. This will help melt the cheese beautifully and get that gooey goodness you’re aiming for. Step 5: Toast the Buns While the cheese melts, take those slider buns and toast them cut-side down on the grill or skillet until they reach a lovely golden brown. This adds fantastic texture to the sliders. Step 6: Assemble Your Sliders It’s the grand finale! Spread some ketchup and mustard on the toasted buns, layer on the cheesy patties, followed by the dill pickles and sautéed onions. Top it off with the other half of the bun and get ready to indulge. Serve your sliders warm and watch them disappear faster than a magician’s rabbit. Whether enjoyed at a game night or as a quick family dinner, these Juicy Cheeseburger Sliders are sure to hit the spot every time! Perfecting Juicy Cheeseburger Sliders Cooking Process To create the ideal Juicy Cheeseburger Sliders, start by prepping all your ingredients. Sear the patties to lock in flavor, then add cheese towards the end. Toast the buns last for a crispy finish, assembling everything right before serving. Add Your Touch to Juicy Cheeseburger Sliders Feel free to customize your Juicy Cheeseburger Sliders by swapping the cheddar for pepper jack or adding jalapeños for a spicy kick. You can also try different sauces, like barbecue or sriracha mayo, to elevate the flavor profile. Storing & Reheating Juicy Cheeseburger Sliders To store your Juicy Cheeseburger Sliders, wrap them tightly in plastic wrap or foil and refrigerate for up to three days. When reheating, use an oven or skillet to maintain the sliders’ delicious texture without making them soggy in the microwave. Cooking these Juicy Cheeseburger Sliders reminds me of backyard barbecues when my friends declared my burgers “the best they’ve ever had.” It’s those moments that keep me creating in the kitchen. FAQs About Juicy Cheeseburger Sliders What is Juicy Cheeseburger Sliders? Juicy Cheeseburger Sliders are mini versions of the classic cheeseburger, perfectly sized for snacking or serving at gatherings. Made with quality ground beef, these sliders deliver a burst of flavor with every bite. Often topped with sharp cheddar cheese, pickles, and sautéed onions, they provide a delightful combination of textures. Their smaller size makes them ideal for entertaining, keeping the crowd happy, and they’re customizable to suit your preferences. Whether grilled or cooked in a skillet, these sliders are a delicious and easy meal option. How do I make Juicy Cheeseburger Sliders more flavorful? To elevate the flavor of your Juicy Cheeseburger Sliders, consider mixing spices into the ground beef before forming the patties. Garlic powder, onion powder, or even a hint of smoked paprika can add depth. Additionally, experimenting with different types of cheese or adding toppings like avocado or spicy jalapeños can create a unique twist. Don’t forget to toast your slider buns for an extra crunch and flavor, enhancing the overall
Prawn Guacamole Rice Paper Wraps: Quick, Healthy Snack Recipe
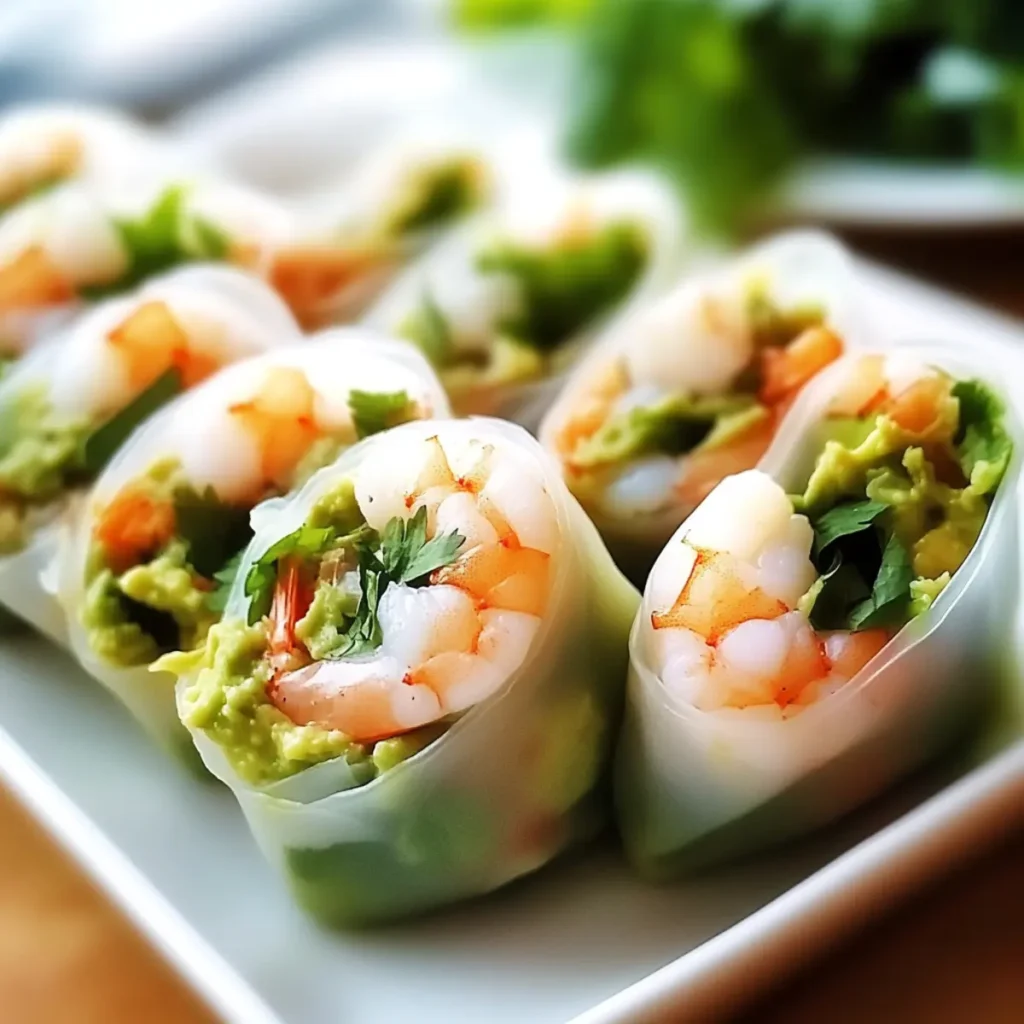
Prawn Guacamole Rice Paper Wraps are the ultimate fusion of flavors and textures, ensuring an explosion of deliciousness in every bite. Imagine succulent prawns embraced by creamy avocado, all wrapped snugly in thin, delicate rice paper – it’s like a taste bud party that your mouth has been waiting for. Whenever I whip these up, memories flood back of sunny afternoons with friends, gathered around the table eagerly unwrapping these beauties. Whether it’s a weeknight dinner or a casual get-together, these Prawn Guacamole Rice Paper Wraps are the perfect social dish, guaranteed to impress and satisfy. Ingredients for Prawn Guacamole Rice Paper Wraps Here’s what you’ll need to make this delicious Prawn Guacamole Rice Paper Wraps: 8 rice paper wrappers – These translucent wraps are a key component, providing a delicate and chewy texture wrapped around the flavorful fillings. 8 large prawns (peeled and deveined) – Opt for fresh or frozen prawns; the juiciness and taste of properly cooked prawns bring these wraps to life. 1 ripe avocado (mashed) – The creaminess of a perfectly ripe avocado adds richness and smoothness, balancing the dish’s flavors. 2 tbsp lime juice – Freshly squeezed lime juice livens up the guacamole, providing a zesty kick and preventing the avocado from browning. 2 tbsp chopped cilantro – This herb brings a hint of brightness and freshness to the wraps, enhancing their overall flavor. Salt and pepper to taste – These basic seasonings are essential for highlighting the natural flavors of the dish. Sriracha or chili sauce for dipping (optional) – A little heat never hurt anyone; this sauce adds an extra layer of flavor for those who like it spicy. How to Make Prawn Guacamole Rice Paper Wraps Follow these simple steps to prepare this delicious Prawn Guacamole Rice Paper Wraps: Step 1: Cook the Prawns Heat a skillet over medium-high heat and add a splash of oil. Season the prawns with salt and pepper, then toss them into the sizzling skillet. Cook until they turn pink and opaque, roughly 2-3 minutes per side. Once perfectly cooked, set the prawns aside to cool. Step 2: Make the Guacamole In a mixing bowl, combine the mashed avocado, lime juice, chopped cilantro, salt, and pepper. Stir everything together until you achieve a creamy, luscious guacamole. Taste it, and feel free to adjust the seasoning to your liking. Step 3: Soak the Rice Paper Wrappers Prepare a shallow dish of warm water. One by one, dip each rice paper wrapper into the water until it softens and becomes pliable, roughly 10-15 seconds. Lay the softened wrappers flat on a clean surface. Step 4: Assemble the Wraps In the center of each wrapper, spread about 1 tablespoon of the guacamole. Add 2-3 cooked prawns on top, and if you’re feeling adventurous, throw in some shredded carrots or cucumber slices for an extra crunch. Step 5: Roll ‘Em Up Fold in the sides of the rice paper over the filling, then roll tightly from the bottom upwards to create a snug wrap. Make sure it’s wrapped up like a present because, trust me, the contents are going to be a delightful little surprise. Step 6: Serve and Enjoy Arrange the wraps on a platter and serve them with a side of Sriracha or your favorite chili sauce for dipping. Take a moment to admire your handiwork before diving into these beautiful Prawn Guacamole Rice Paper Wraps. These wraps are not just easy to make; they transform basic ingredients into something truly delightful. With the flavors of zingy lime, rich avocado, and succulent prawns, you’ll have everyone coming back for seconds! So, gather your friends or keep it all for yourself – either way, this dish promises a smile with every bite! Perfecting Prawn Guacamole Rice Paper Wraps Cooking Process Start by cooking the prawns while preparing the guacamole mixture. Soak the rice paper wrappers just before assembling to keep them fresh and pliable. This sequence ensures every element is ready at the right time for a smooth assembly process. Add Your Touch to Prawn Guacamole Rice Paper Wraps Feel free to switch things up by adding shredded carrots, sliced cucumber, or even some diced mango to the wraps. You might try different herbs like mint or basil for a unique twist on the classic guacamole flavor. Storing & Reheating Prawn Guacamole Rice Paper Wraps Store any leftover wraps in an airtight container in the refrigerator for up to two days. To reheat, place them in a skillet over medium heat for a minute or two to revive their texture, keeping them crispy. It was during a casual get-together with friends that I first made Prawn Guacamole Rice Paper Wraps. The look on their faces when they took their first bite was priceless! It’s moments like these that remind me the kitchen is truly the heart of the home. FAQs About Prawn Guacamole Rice Paper Wraps What is Prawn Guacamole Rice Paper Wraps? Prawn Guacamole Rice Paper Wraps are a delightful fusion of fresh ingredients wrapped in delicate rice paper. This dish combines succulent prawns with creamy guacamole, made from ripe avocados and zesty lime juice. The rice paper adds a light, chewy texture that contrasts beautifully with the rich filling. These wraps not only embody a healthy snack option but also serve as a sophisticated appetizer that impresses guests at gatherings. Quick to prepare, they are perfect for both casual and elegant occasions. How long do Prawn Guacamole Rice Paper Wraps last? Once assembled, Prawn Guacamole Rice Paper Wraps are best enjoyed fresh but can be stored in an airtight container in the refrigerator for up to two days. To maintain their texture, it’s crucial to separate layers with parchment paper to prevent sticking. If you need to prepare them earlier, consider keeping the ingredients separate and assembling them just before serving to enhance freshness and flavor. Enjoy these wraps cold or lightly heated for a delightful experience. Can I customize my Prawn Guacamole Rice Paper Wraps? Absolutely!
Delicious Philly Cheesesteak Sliders Recipe for Game Day Feasts
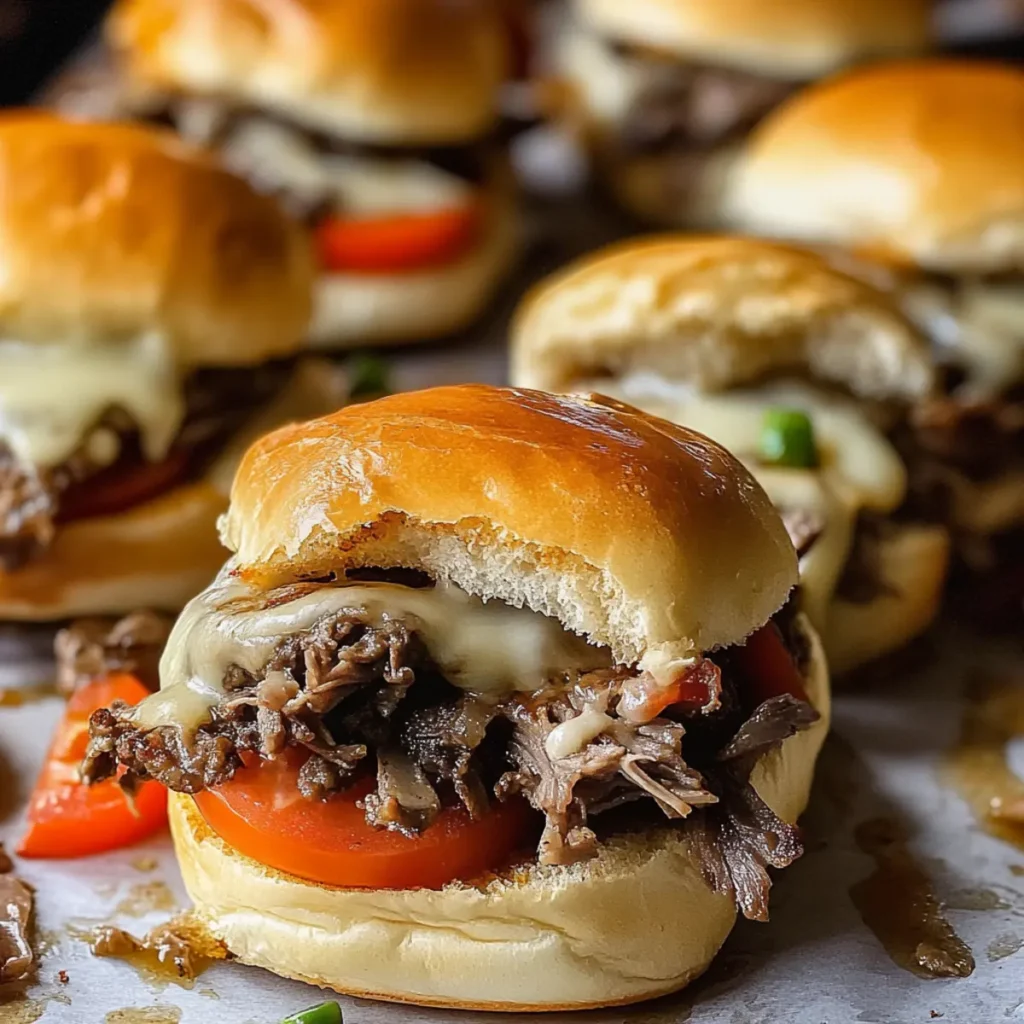
The aroma of sizzling ribeye mingling with sweet sautéed onions and vibrant bell peppers dances through the air as you prepare to indulge in these mouthwatering Philly Cheesesteak Sliders. This dish encapsulates everything we love about comfort food: rich flavors, gooey cheese, and soft, pillowy buns that beckon for a hearty bite. Whether you’re gathered with friends for a game day feast or simply craving some serious munchies, these sliders are the answer to your culinary prayers. Imagine the excitement of lifting a warm bun, just golden brown from the oven, to reveal a glorious layer of tender steak, crisp veggies, and melty cheese. To savor these Philly Cheesesteak Sliders is to experience a celebration on your taste buds, a dish that invites laughter, and fun while making unforgettable memories over shared plates. Ingredients for Philly Cheesesteak Sliders Here’s what you’ll need to make this delicious Philly Cheesesteak Sliders: 1 lb thinly sliced ribeye steak – Opt for high-quality ribeye for maximum flavor; you can ask your butcher for the perfect cut. 8 soft slider buns – Choose soft, fresh slider buns that can hold the filling without falling apart; think Hawaiian or classic dinner rolls. 1 cup sliced bell peppers (mixed colors) – Mixing colors adds visual appeal and a sweetness that pairs perfectly with the savory steak. 1 cup sliced sweet onions – Sweet onions caramelize beautifully, adding depth and flavor to your sliders. 4 oz provolone cheese, sliced – Provolone melts wonderfully and complements the flavors; feel free to mix it with mozzarella for extra gooeyness. 2 tbsp butter, melted – This will help achieve a golden, crispy top on your sliders. 1 tbsp Worcestershire sauce – A dash of this sauce enhances the savory flavors of the steak beautifully. Salt and pepper to taste – Essential for bringing out all those rich, delicious flavors. How to Make Philly Cheesesteak Sliders Follow these simple steps to prepare this delicious Philly Cheesesteak Sliders: Step 1: Preheat and Prepare Preheat your oven to 350°F (175°C). While it’s heating up, grab a baking dish and generously grease it with non-stick cooking spray to ensure those sliders come out perfectly. Step 2: Sauté the Veggies In a large skillet over medium heat, add a drizzle of olive oil and toss in the sliced onions and bell peppers. Sauté for about 5-7 minutes until they are softened and aromatic, filling your kitchen with a delightful scent. Step 3: Cook the Steak Next, add the thinly sliced ribeye steak to the skillet. Season generously with salt and pepper. Cook for about 5 minutes, or until the steak is browned, making sure to stir occasionally and let those flavors mix. Step 4: Layer the Sliders Place the bottom halves of your slider buns in the greased baking dish. Spoon the steak and veggie mixture over the buns, followed by a layer of provolone cheese, ensuring every bite will be cheesy goodness. Step 5: Assemble and Brush Place the top halves of the slider buns over the cheese, then mix the melted butter with the Worcestershire sauce. Brush this mixture over the top of the buns to give them that golden finish. Step 6: Bake and Serve Slide the pan into the preheated oven and bake for 15-20 minutes, or until the tops are golden brown and crispy. Once done, remove from the oven, let cool slightly, and serve warm for an irresistible treat. These Philly Cheesesteak Sliders are not just a delightful addition to your snack table; they can become a staple in your home cooking repertoire. They are perfect for game days, casual gatherings, or you know, just because it’s a Tuesday and you deserve something delicious. Enjoy every comforting, cheesy bite! Perfecting Philly Cheesesteak Sliders Cooking Process Start by sautéing the onions and bell peppers until softened, which builds a solid flavor foundation. Meanwhile, brown the ribeye steak for a juicy filling. Assemble the sliders by layering bun halves with the steak mixture and cheese before baking to crispy perfection. Add Your Touch to Philly Cheesesteak Sliders Experiment with your favorite toppings like jalapeños for heat or mushrooms for earthiness. Swap provolone with pepper jack for a spicy kick, or go for American cheese if you prefer that classic melty goodness. Your sliders, your rules! Storing & Reheating Philly Cheesesteak Sliders Store leftover sliders in an airtight container in the fridge for up to three days. Reheat in the oven at 350°F for about 10 minutes to restore that toasty texture while keeping the filling warm and delicious. The first time I made these sliders, my friends devoured them so fast that I barely got to taste one myself. The laughter and compliments were the best seasoning I could have asked for! FAQs About Philly Cheesesteak Sliders What is Philly Cheesesteak Sliders? Philly Cheesesteak Sliders are a delicious twist on the classic Philly cheesesteak sandwich, presented in a bite-sized format perfect for gatherings and game days. They consist of tender ribeye steak, sautéed onions, and bell peppers, all layered between soft slider buns. Topped with melted provolone cheese and brushed with a flavorful mixture of butter and Worcestershire sauce, these sliders deliver a delightful combination of flavors and textures that will have everyone coming back for more. How can I customize my Philly Cheesesteak Sliders? The beauty of Philly Cheesesteak Sliders lies in their versatility. You can experiment with various toppings to suit your taste. Add jalapeños for a spicy kick, or incorporate mushrooms for added earthiness. If you prefer alternative cheeses, try pepper jack for extra heat or classic American cheese for that ultimate melty goodness. Mix and match to create sliders that fit your family’s flavor preferences! Can I make Philly Cheesesteak Sliders ahead of time? Absolutely! You can prepare Philly Cheesesteak Sliders in advance, making them a great option for meal prep or parties. Assemble the sliders, cover them tightly, and refrigerate for up to 24 hours before baking. When you’re ready to serve, simply pop them in
Deliciously Creamy Avocado Crema Recipe for Any Occasion
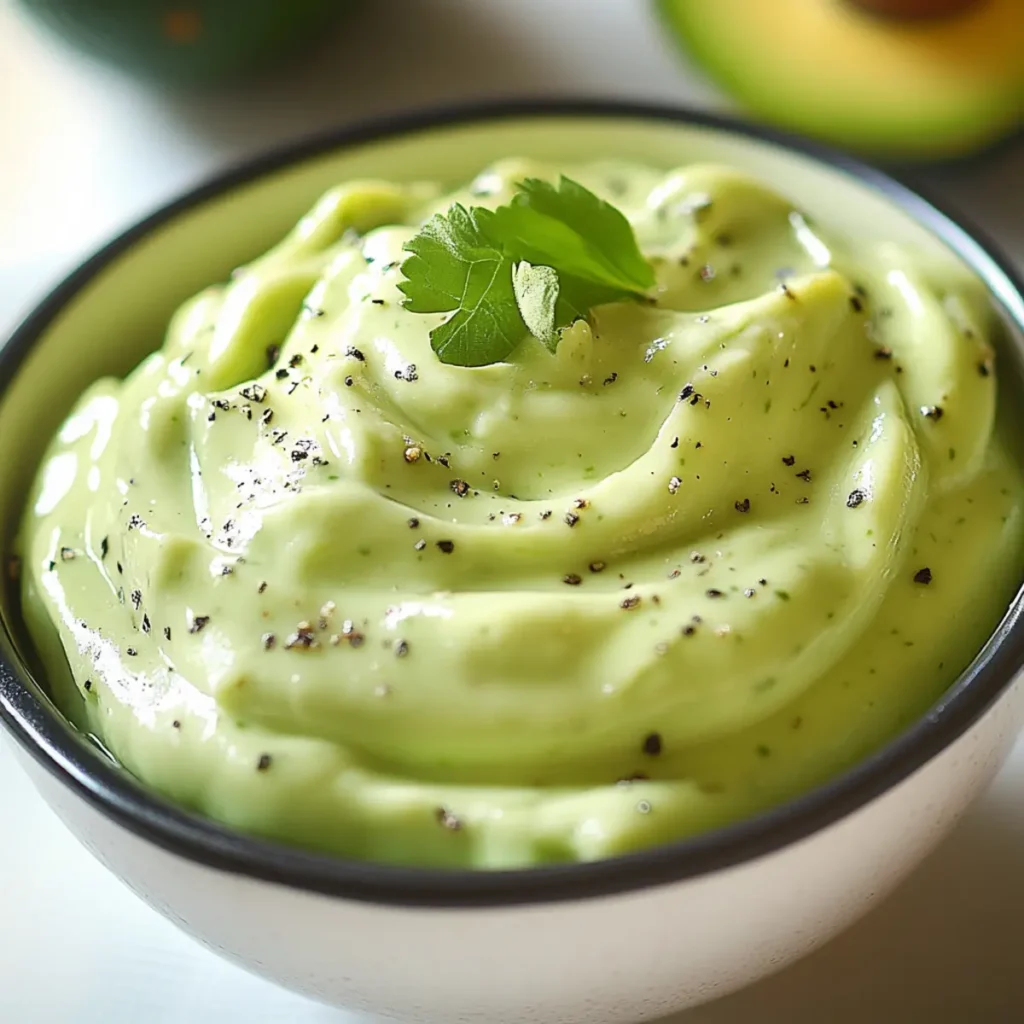
Avocado Crema is the culinary equivalent of a warm hug on a chilly day. Imagine creamy, lush avocados dancing with zesty lime juice while a hint of garlic adds just the right amount of intrigue. This dip isn’t just food; it’s an experience. Whether you’re prepping for taco night or simply munching with chips, this creation will awaken your taste buds and set the mood for good times. Let me tell you, every time I whip up a batch of Avocado Crema, it transports me back to carefree summer barbecues, where laughter mingled with the scent of freshly grilled goodies. Perfect for topping off a spicy dish or acting as a cool dip for a snack, this delightful dish earns a permanent slot in my recipe repertoire. Trust me, once you try it, you’ll want to make this creamy goodness for every gathering. Ingredients for Avocado Crema Here’s what you’ll need to make this delicious Avocado Crema: 2 ripe avocados – Choose avocados that yield slightly to gentle pressure, indicating they are perfectly ripe for optimal creaminess. 2 tablespoons fresh lime juice – Freshly squeezed lime juice adds a vibrant tang that brightens the dish beautifully; bottled juice just doesn’t cut it. 1 garlic clove – A single clove packs a punch of flavor; feel free to adjust based on your love for garlic. ¼ cup fresh cilantro (optional) – Adds a fresh, herbal note that complements the creaminess, but it’s totally optional for those who aren’t fans. ½ cup sour cream or Greek yogurt – Both create a lush texture, but Greek yogurt adds protein and a bit of tang. Salt and pepper to taste – Simple seasonings that elevate all the flavors to the next level. How to Make Avocado Crema Follow these simple steps to prepare this delicious Avocado Crema: Step 1: Prepare Your Ingredients Start by chopping the ripe avocados in half, removing the pit, and scooping the flesh into your blender. Also, peel and smash the garlic clove until it’s fragrant. Step 2: Blend the Ingredients In your blender or food processor, combine the avocados, lime juice, garlic, cilantro (if using), and sour cream or Greek yogurt. Sprinkle in salt and pepper for that flavor boost. Blend until smooth and creamy, scraping down the sides as necessary for a perfect consistency. Step 3: Taste and Adjust Give your Avocado Crema a taste test. This is the moment to add more lime juice, salt, or even an extra clove of garlic if you’re feeling adventurous. Remember, it’s your dish – make it how you like it! Step 4: Chill (Optional) While this step is optional, refrigerating the crema for about 30 minutes lets the flavors meld together beautifully. Plus, it’s refreshing when served cold. Step 5: Serve and Enjoy Spoon your Avocado Crema into a serving bowl and watch it disappear. Serve it as an accompaniment to tacos, burritos, or simply alongside some crunchy tortilla chips for a delightful dip. Enjoy every creamy bite! Now that you have mastered the art of Avocado Crema, you’re on your way to becoming the hero of your next gathering. Just imagine the compliments rolling in as you serve this colorful treat! This showstopping Avocado Crema delivers restaurant-quality results using simple ingredients you probably already have at home. The perfect balance of textures and flavors creates an unforgettable dining experience that will have everyone asking for seconds. Picture-perfect presentation with vibrant colors makes this dish absolutely Instagram-worthy and guaranteed to impress any dinner guest. Incredibly versatile recipe that works beautifully for weeknight dinners, meal prep, special occasions, or even outdoor entertaining sessions. Perfecting Avocado Crema Cooking Process Start by preparing your ingredients: chop the avocados and garlic first. Then, blend everything together efficiently for a creamy consistency. Finally, chilling the mixture for about 30 minutes enhances its flavors for a tastier experience. Add Your Touch to Avocado Crema Feel free to customize your Avocado Crema! Swap sour cream for Greek yogurt for a tangy kick, or add jalapeños for a spicy twist. You can also experiment with herbs like parsley or chives for unique flavor profiles. Storing & Reheating Avocado Crema To store your Avocado Crema, place it in an airtight container in the refrigerator. For best quality, consume it within two days. It’s best enjoyed fresh, but if reheating is necessary, gently warm it on low heat. One evening, I made Avocado Crema for a small get-together. As my friends took their first bites, their eyes lit up with delight, and one even declared it the “best dip ever.” That encouragement made my day! FAQs About Avocado Crema What is Avocado Crema? Avocado Crema is a smooth and creamy dip that combines ripe avocados, lime juice, garlic, and either sour cream or Greek yogurt. This delightful mix creates a vibrant green sauce that’s perfect for pairing with tacos, grilled meats, or even fresh veggies. It’s a versatile condiment that adds a refreshing twist to any dish, transforming ordinary meals into something special. Ideal for parties or weekday dinners, Avocado Crema is a beloved staple in many households due to its delicious flavor and easy preparation. How do you make Avocado Crema? To create your own Avocado Crema, start by gathering ripe avocados, fresh lime juice, garlic, and either sour cream or Greek yogurt. Simply chop the avocados and garlic, then blend all ingredients together in a food processor until smooth. For an added kick, feel free to include cilantro or jalapeños. Once you blend everything, you can taste and adjust the seasoning, chill it in the fridge for about 30 minutes, and enjoy a deliciously creamy dip that everyone will love. Can I customize my Avocado Crema? Absolutely! One of the best aspects of Avocado Crema is its versatility. You can swap out sour cream for Greek yogurt for a tangy twist, or add fresh herbs like parsley for a unique flavor profile. If you’re a fan of spice, throwing in some jalapeños can elevate the heat. Not
Delicious Fried Pickle Dip Recipe Ready in Just 15 Minutes
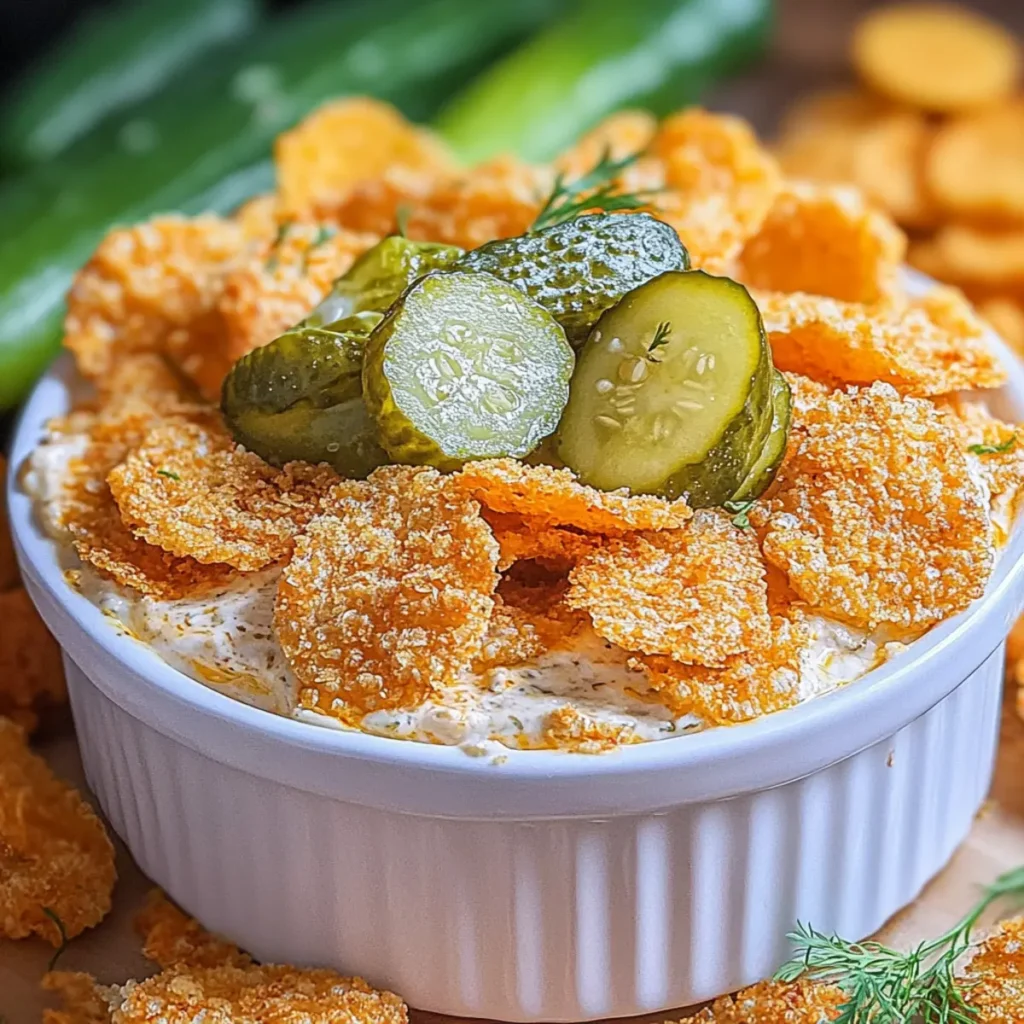
There is something undeniably delightful about Fried Pickle Dip. It’s like your favorite guilty pleasure got a gourmet makeover, blending the crunch of pickles with the creamy comfort of cheese. Imagine dipping into a bowl brimming with vibrant colors and tantalizing aromas, every bite delivering a perfect punch of tangy, savory goodness. This dip is the showstopper that will leave your taste buds dancing and your guests clamoring for more. Picture this: a sunny afternoon gathering, friends huddled around the snack table, laughter echoing amidst the clinking of glasses. You scoop up the Fried Pickle Dip, and as you take that first bite, you’re transported back to summer picnics filled with laughter and joy. This dish is perfect for any occasion, whether it’s a movie night in or a lively backyard barbecue. Trust me, once you get a taste, you’ll be dreaming about it long after the last bite is gone. Ingredients for Fried Pickle Dip Here’s what you’ll need to make this delicious Fried Pickle Dip: 0.5 cup Panko bread crumbs – These crispy crumbs provide a delightful crunch topping that contrasts beautifully with the creamy dip. 1 tablespoon butter – Melting this with the Panko gives it a rich flavor and ensures a perfect golden-brown toast. 2 cups sour cream – The creamy base that balances the tanginess of the pickles and adds a luscious texture. 4 oz cream cheese, softened – This creamy addition makes the dip extra rich and satisfying, elevating it to an addictive level. 1 packet ranch seasoning (about 1 oz, or 2 tbsp) – Adds an instant burst of flavor, making the dip reminiscent of a classic ranch dressing. 1 tablespoon lemon juice – A splash of brightness that enhances the flavors and cuts through the richness of the creams. 3 tablespoons dill pickle juice – This magical liquid infuses the dip with that iconic pickle tang, giving it its signature taste. 1.5 cups dill pickles, chopped – These are the stars of the show! Their crispness and tanginess bring the dip to life. 2 cloves garlic, crushed – A little punch of garlic flavor to elevate everything. 1 tablespoon fresh chives, minced – A pop of color and mild onion flavor that complements the other ingredients nicely. 1 tablespoon fresh dill, minced – Adds an aromatic herbaceous note that pulls everything together beautifully. Salt and pepper (to taste) – Essential seasonings that enhance the natural flavors of the ingredients. Hot sauce (optional, to taste) – For those who like a bit of heat, a dash can really kick things up. How to Make Fried Pickle Dip Follow these simple steps to prepare this delicious Fried Pickle Dip: Step 1: Mix the Creamy Base In a mixing bowl, combine the sour cream, cream cheese, ranch seasoning, lemon juice, and dill pickle juice. Mix these ingredients until your mixture is beautifully smooth and creamy—this is the foundation of our dip! Step 2: Add the Flavor Bombs Stir in the chopped dill pickles, crushed garlic, minced chives, and minced dill. Watch as it transforms from a simple cream base into a colorful, flavorful concoction that will have your mouth watering in no time. Step 3: Season It Up Taste your masterpiece! Season with salt and pepper to balance the flavors and add hot sauce if you like a spicy kick. This dip deserves to shine, so make it your own! Step 4: Toast the Panko In a separate pan over medium heat, melt the butter. Once melted, add the Panko bread crumbs and toast them until golden brown and crispy. This will create a deliciously crunchy topping for your dip. Step 5: Assemble and Serve Transfer the dip to your favorite serving bowl and sprinkle the toasted Panko on top for that irresistible crunch. You can serve it immediately with an array of dippers, like tortilla chips, veggies, or even crackers. Step 6: Enjoy! Dig in and enjoy the comforting, tangy goodness of your Fried Pickle Dip. Perfect for gatherings, movie nights, or just a little indulgence after a long day! Trust me, once you whip up this Fried Pickle Dip and see the joy it brings to your friends and family, you’ll be adding it to your weekly rotation. Brace yourself for compliments, because this scrumptious dip will have everyone raving—get ready for the party to kick off! Perfecting Fried Pickle Dip Cooking Process First, whip up the creamy base by mixing the sour cream, cream cheese, and seasonings. While it’s chilling, toast the Panko bread crumbs to golden perfection for that crunchy topping. This sequence keeps flavors vibrant and ensures smooth execution. Add Your Touch to Fried Pickle Dip Make this Fried Pickle Dip truly yours by swapping out the dill pickles for spicy jalapeños or adding crumbled bacon for extra crunch. Experiment with different herbs like parsley or cilantro for a fresh twist. Your taste buds will thank you! Storing & Reheating Fried Pickle Dip To store your Fried Pickle Dip, transfer it to an airtight container and refrigerate for up to three days. When reheating, do so gently in the microwave or on the stovetop, adding a splash of pickle juice to revive its creamy texture. When I first served this Fried Pickle Dip at a backyard barbecue, my friends devoured it in record time. Their faces lit up with joy, and I knew I had struck gold with this recipe that had everyone begging for the last bite. FAQs About Fried Pickle Dip What is Fried Pickle Dip? Fried Pickle Dip is a creamy, tangy dip that combines the flavors of ranch seasoning and dill pickles into a delectable treat. This dish starts with a base of sour cream and cream cheese, which creates a rich texture that’s perfect for dipping. It’s usually topped with crispy Panko bread crumbs for an added crunch. Ideal for parties, barbecues, or cozy nights in front of the TV, this dip is sure to please everyone who loves the tang of pickles with
Delicious Japanese Carrot Ginger Dressing Recipe in 10 Minutes
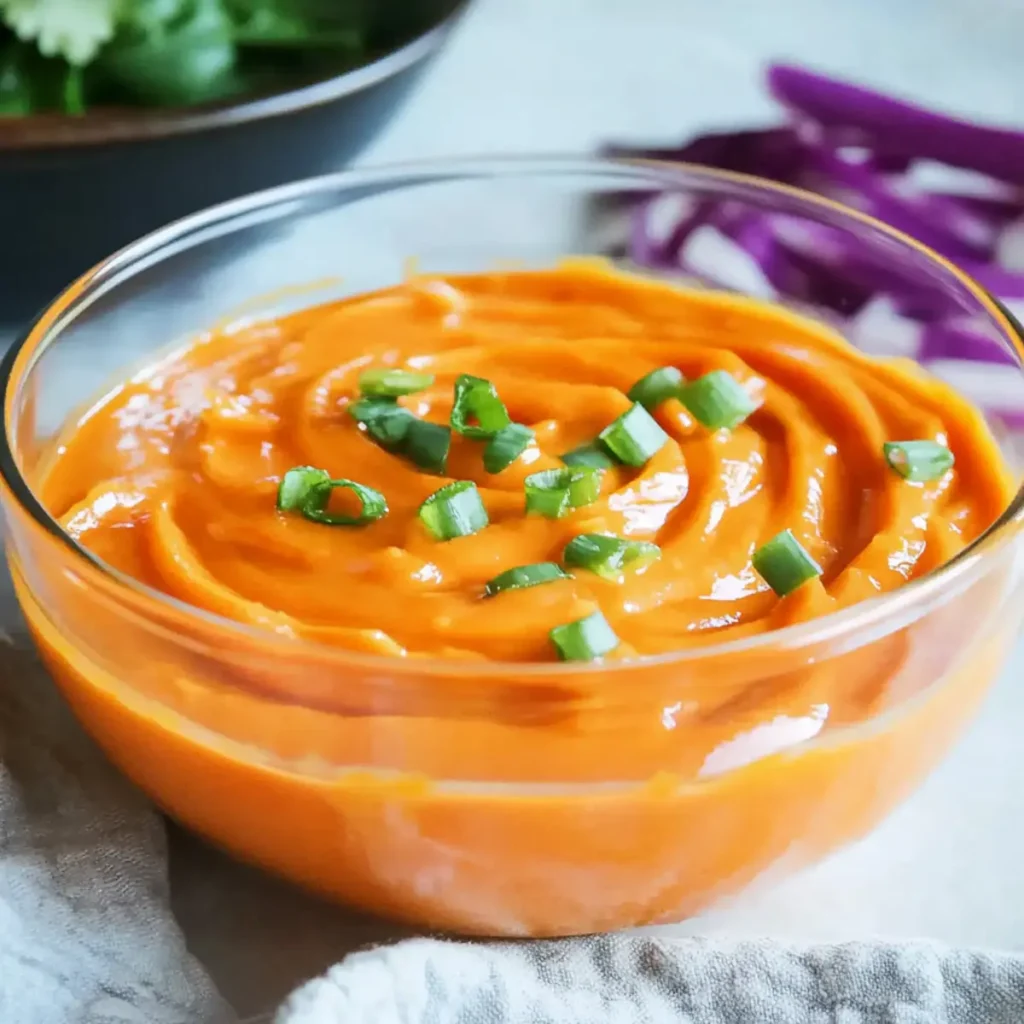
The moment you take a whiff of this delicious Japanese Carrot Ginger Dressing, the vibrant aromas of fresh ginger and sweet carrots will dance like a happy little ditty through your kitchen. This easy-to-make dressing is not just a flavored sauce—it’s a burst of sunshine that transforms your humble salads into a culinary celebration. If you’re looking to impress your friends or elevate your meals in a matter of minutes, then this delicious Japanese Carrot Ginger Dressing recipe in 10 minutes is your new best friend. Imagine a lively family gathering where everyone is serving up their favorite dishes, and here you come with a homemade dressing that has them begging for the recipe! Whether it’s a backyard barbecue or a cozy dinner party, this dressing will become the star of any meal, making you the culinary hero in the eyes of your guests. Plus, there’s a sweet satisfaction in knowing you’ve concocted something so flavorful while being deceptively easy to whip up. So, ready your blender; adventure awaits! Ingredients for Delicious Japanese Carrot Ginger Dressing Recipe in 10 Minutes Here’s what you’ll need to make this delicious Delicious Japanese Carrot Ginger Dressing Recipe in 10 minutes: 7 ounces carrots – Peeled and chopped for that sweet, vibrant base.Choose fresh, firm carrots for the best flavor. 4 ounces onion – Peeled and finely chopped to add depth. A sweet onion works great for a mild flavor. 2 tablespoons ginger – Peeled and finely chopped, offering a zingy kick that brightens the dressing. 1 tablespoon granulated sugar – Balances the tanginess of the soy sauce and rice vinegar beautifully. 1/4 cup soy sauce – Adds umami and saltiness while deepening the flavor profile of the dressing. 1/2 cup rice vinegar – This gives the dressing its refreshing acidity. Look for unseasoned rice vinegar for the best results. 1/2 teaspoon salt – Enhances all the flavors without overpowering them. 3/4 cup organic canola or vegetable oil – This emulsifies the dressing, creating a luscious, creamy texture. How to Make Delicious Japanese Carrot Ginger Dressing Recipe in 10 Minutes Follow these simple steps to prepare this delicious Delicious Japanese Carrot Ginger Dressing recipe in 10 minutes: Step 1: Blend the Base Ingredients In a blender, combine the chopped carrots, onion, ginger, granulated sugar, soy sauce, rice vinegar, and salt. Blend the mixture until smooth, allowing those flavors to meld into a harmonious melody. Step 2: Emulsify with Oil While the blender is running, slowly drizzle in the organic canola or vegetable oil. This step is crucial; it turns your vibrant mixture into a luscious dressing by emulsifying the ingredients beautifully. Step 3: Taste and Adjust Once your dressing reaches a creamy consistency, taste it! This is the moment to adjust seasoning if necessary. Add a pinch more sugar for sweetness or an extra dash of soy sauce for deeper flavor if you’d like to enhance that umami kick. Step 4: Chill and Serve Transfer the dressing to an airtight container and let it chill in the refrigerator for at least 10 minutes. This will allow the flavors to meld even further, giving you a dressing that’s out of this world! Step 5: Choose Your Greens When you’re ready to enjoy, serve this dressing over crisp lettuce varieties like iceberg or romaine. You can also use it as a dip for veggies or a topping for rice bowls. Step 6: Enjoy with Flair Transfer the dressed salad onto plates, make sure to drizzle any leftover dressing on top. Your guests will appreciate the extra love, and you will step into the spotlight as the honored chef of the evening! With just ten minutes and a handful of simple ingredients, this delicious Japanese Carrot Ginger Dressing adds not only a burst of flavor but also a splash of color to your meals. So grab those veggies and blender, and let your culinary adventure begin! Perfecting Delicious Japanese Carrot Ginger Dressing Recipe in 10 Minutes Cooking Process To efficiently whip up this dressing, start by peeling and chopping the carrots, onion, and ginger. Blend these ingredients until smooth, then gradually add the oil to emulsify. It’s as easy as that! Add Your Touch to Delicious Japanese Carrot Ginger Dressing Recipe in 10 Minutes Feel free to customize your dressing by adding garlic for a kick or substituting honey for sugar. You could also experiment with different oils like sesame to elevate the flavor profile. Storing & Reheating Delicious Japanese Carrot Ginger Dressing Recipe in 10 Minutes Store any leftovers in an airtight container in the fridge for up to a week. Just give it a good shake before using as the ingredients may separate over time. Share a memorable experience related to the recipe, whether it’s feedback from friends and family, a special occasion, or a cooking tip that made all the difference. I still remember the night my best friend took one bite and exclaimed that this dressing had “magically transformed” her salad. It was a delightful moment that made me appreciate the power of good food. FAQs About Delicious Japanese Carrot Ginger Dressing Recipe in 10 Minutes What is Delicious Japanese Carrot Ginger Dressing Recipe in 10 Minutes? Delicious Japanese Carrot Ginger Dressing Recipe in 10 Minutes is a vibrant and flavorful dressing that transforms simple greens into a culinary delight. This dressing features a perfect blend of fresh carrots, ginger, and a hint of sweetness, balanced by soy sauce and rice vinegar. It not only enhances salads but also pairs wonderfully with grilled meats and seafood. Crafted in just 10 minutes, it’s a quick way to elevate your meals without much fuss. How can I customize the Delicious Japanese Carrot Ginger Dressing Recipe in 10 Minutes? You can absolutely personalize your dressing! Consider adding garlic for an extra punch or substituting honey for sugar to create a nuanced flavor. Maybe you’re a sesame oil enthusiast? Swapping out canola for sesame oil introduces an aromatic depth. Feel free to play with the ingredients;